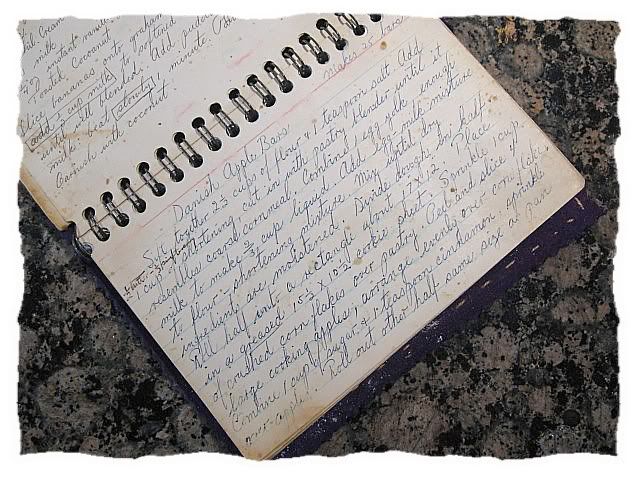
I suppose most of us...when we remember our Mothers in the kitchen...think of one special culinary creation that stands out from the others. See this recipe? This is mine. Danish Apple Bars. This was my Mother's specialty...the dish everyone requested...for birthdays...potlucks...you name it. I treasure this recipe, preserved in her own delicate handwriting...and whenever I make them, I think of her...and miss her. She was an amazing woman. Someday...when I have the time to do her justice...I'll introduce her to you. For now, I'll share her recipe with you.
DANISH APPLE BARS
Pastry:
2 1/2 cups sifted all-purpose flour
1 tsp salt
1/2 cup cold butter
1/2 cup vegetable shortening (aka Crisco)
1 egg, separated
milk
4 or 5 large cooking apples, cored, peeled and sliced extremely thin (you may want to use a mandolin-thingy)
1 cup crushed cornflakes
1 cup sugar
1 tsp cinnamon
Icing:
1 cup powdered sugar
2 tbsp water
1/2 tsp vanilla
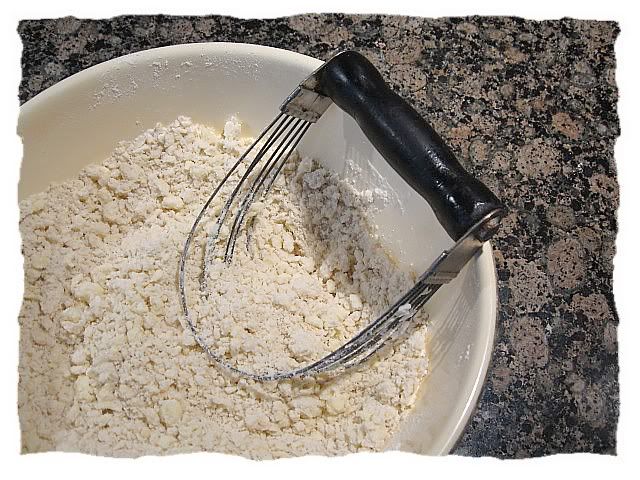
Sift together the flour and salt. Using a pastry blender, cut in the butter and shortening until it resembles coarse cornmeal. (I never get it that fine, but that's OK. This dough is very forgiving.)
Combine the egg yolk with enough milk to make 2/3 cup liquid. Add to the flour-shortening mixture and stir until moistened.
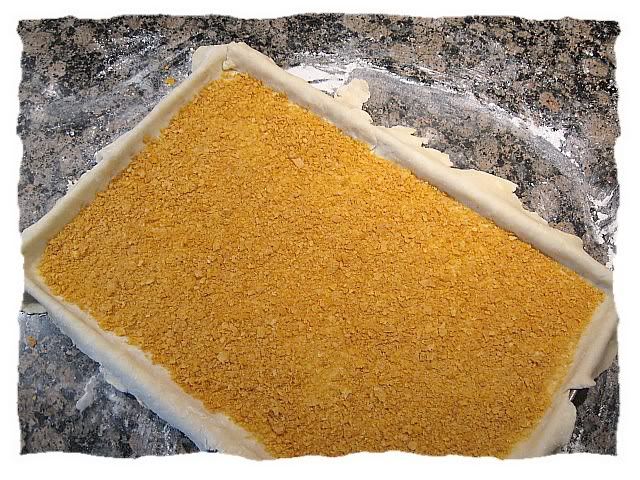
Roll out half the dough into a rectangle about 17" X 12". Place in a 15 1/2" X 10 1/2" jelly roll pan...letting excess dough hang over edges.
Sprinkle crushed cornflakes over dough.
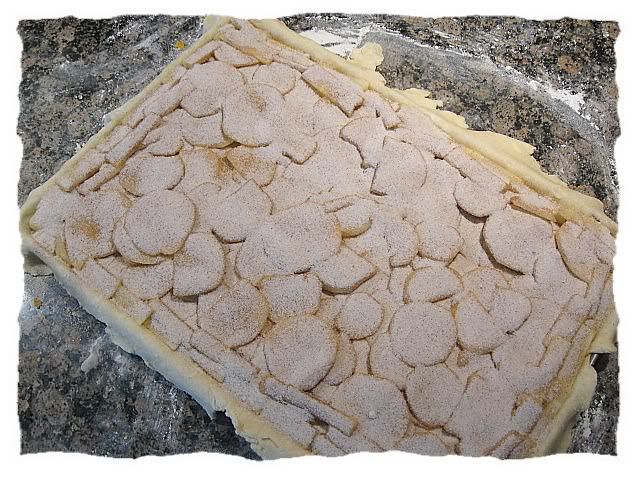
Arrange apple slices evenly over cornflakes.
Combine sugar and cinnamon. Sprinkle over apples.
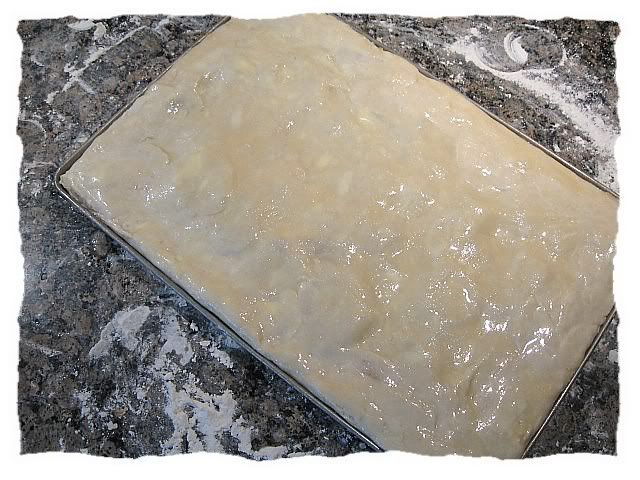
Roll out second half of dough to approximately the same size as the pan. Place over apples. Moisten edges with water. Bring the bottom dough up and over the top, press edges to seal (I stroke the edges with a moistened butter knife).
Beat the egg white until frothy and brush over the top of pastry.
Bake at 400 degrees for 30 minutes, with oven rack about 4 1/2" from the bottom of oven. Cool on rack.
Here's a little peeky-peek at my kitchen, with the freshly baked bars cooling on the bake center. You'll notice that the bake center's top is granite...and a bit lower than the adjacent tile counter-top. We remodeled our kitchen several years ago...and I designed the bake center this way...just so I would have a comfortable place to make these. That's how much this recipe means to me.
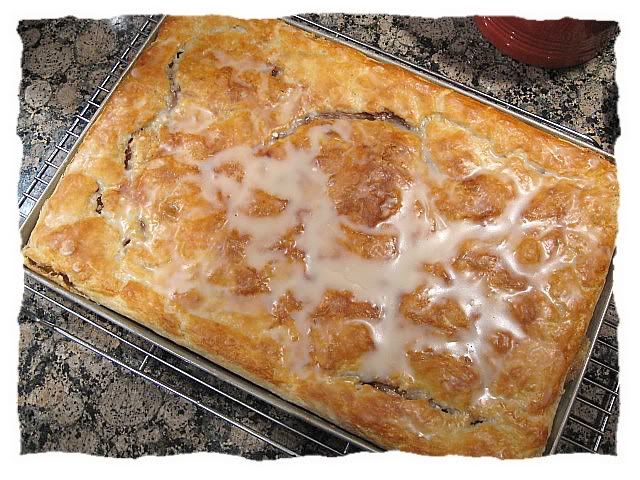
When the bars are cool, combine the powdered sugar, water and vanilla. Spread over top of pastry.
Makes 25 absolutely deliciously decadent bars.
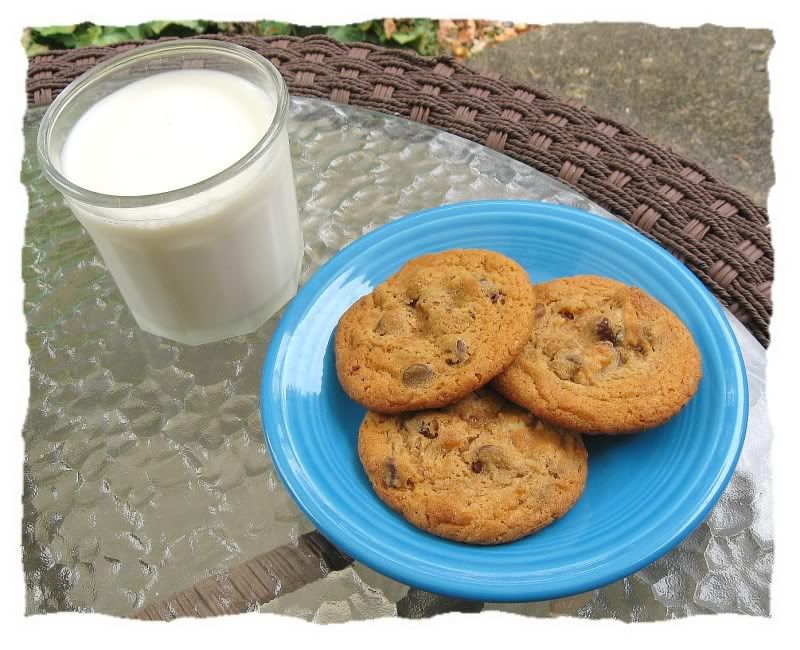
Now...put a couple of these on a pretty Fiestaware plate...grab a glass of ice-cold milk...and go watch "Dancing with the Stars." That's what I'm gonna do!
Showing posts with label What's Cookin'?. Show all posts
Tuesday, October 18, 2011
Wednesday, September 7, 2011
The BEST Chocolate Chip Cookies in the World
Let me be clear. These are NOT Atkins-friendly...nor are they organic...not even "all natural." What they are is...quite simply...the BEST chocolate chip cookies in the world.
CHOCOLATE CHIP COOKIES
3 1/3 cups unsifted all-purpose flour
1 1/2 tsp baking soda
1 1/2 cups butter, softened
1 cup light brown sugar, packed
1/2 cup granulated sugar
1 6-serving package butterscotch instant pudding
3 eggs
1 1/2 tsp vanilla
1 12-oz package semi-sweet chocolate chips
3/4 cup walnut pieces
Sift together flour and baking soda. Combine butter, the sugars, pudding mix and vanilla in a large mixer bowl. Beat until smooth and creamy. Beat in eggs, one at a time. Gradually add flour mixture, and beat on low speed until well combined. Dough will be extremely stiff. Remove beater and stir in chocolate chips and walnuts with a wooden spoon.
Drop by rounded tablespoonfuls onto an un-greased baking sheet. Bake at 360 degrees for 10 minutes. Leave on baking sheet for a few minutes before removing. Cool on racks.
Makes about 3 dozen.
It's cool and drizzly outside today. The Mailman (on staycay) decided to head out to the links sans wifey...and so I have the house to myself. This kind of weather always compels me to bake something...and I DID Jazzercise this morning...and TM loves these cookies...and I AM going to freeze most of them...and...OK...I'm rationalizing..........
Oh, man. They are so GOOD!
CHOCOLATE CHIP COOKIES
3 1/3 cups unsifted all-purpose flour
1 1/2 tsp baking soda
1 1/2 cups butter, softened
1 cup light brown sugar, packed
1/2 cup granulated sugar
1 6-serving package butterscotch instant pudding
3 eggs
1 1/2 tsp vanilla
1 12-oz package semi-sweet chocolate chips
3/4 cup walnut pieces
Sift together flour and baking soda. Combine butter, the sugars, pudding mix and vanilla in a large mixer bowl. Beat until smooth and creamy. Beat in eggs, one at a time. Gradually add flour mixture, and beat on low speed until well combined. Dough will be extremely stiff. Remove beater and stir in chocolate chips and walnuts with a wooden spoon.
Drop by rounded tablespoonfuls onto an un-greased baking sheet. Bake at 360 degrees for 10 minutes. Leave on baking sheet for a few minutes before removing. Cool on racks.
Makes about 3 dozen.
It's cool and drizzly outside today. The Mailman (on staycay) decided to head out to the links sans wifey...and so I have the house to myself. This kind of weather always compels me to bake something...and I DID Jazzercise this morning...and TM loves these cookies...and I AM going to freeze most of them...and...OK...I'm rationalizing..........
Oh, man. They are so GOOD!
Labels:
What's Cookin'?
Friday, August 26, 2011
Just Peachy!
Last Saturday...The Mailman and I...along with my Father-In-Law (a.k.a. The Big Guy)...made our annual peach-picking trip into Michigan. We made a day of it...with stops for breakfast, lunch and shopping (Joann's for me, Tractor Supply for the guys), as well. And between the three of us, we picked three bushels of peaches!
Now, if you have never eaten a ripe-from-the-tree Michigan Red Haven peach...so sorry for you. They are the BEST in the world (my apologies to Georgia). And peaches are my favorite fruit. So...I ate and ate and ate. I lost track of how many peaches I've yummed down in the past week. I know I shouldn't feel too guilty...I mean, they're PEACHES...not Ben and Jerry's, right? But those carbs still add up...and as a result, I've gained a couple of pounds. Not the direction I want to be going.
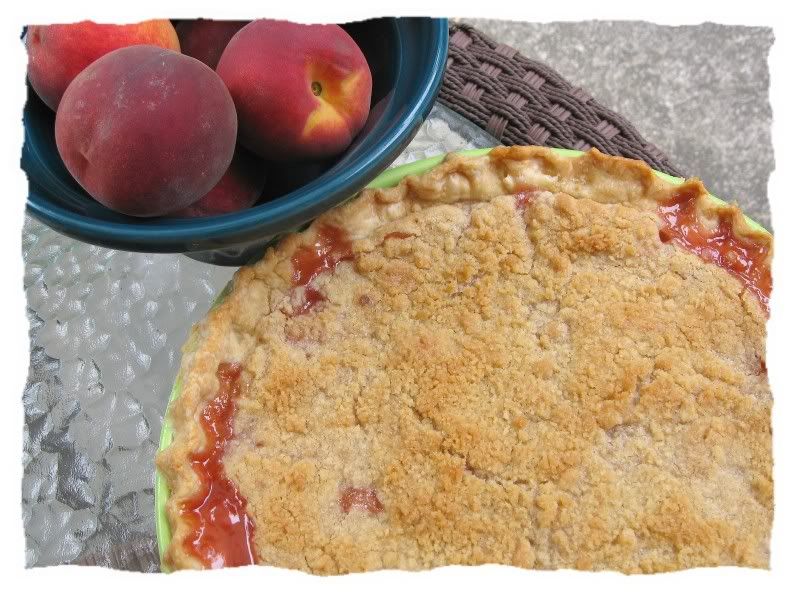
So...yesterday I froze the remaining fruit so that we can enjoy their deliciousness during the Winter. And, I made a pie. From my Mom's Modern Encyclopedia of Cooking, by Meta Given...circa 1959:
PEACH CRUMBLE PIE
Crumble:
3/4 cup all-purpose flour
1/3 cup moist light brown sugar, packed
1/3 cup firm butter
Filling:
1/4 cup sugar
1 to 1 1/2 tbsp flour (I used 1 tbsp cornstarch, because I like the juices to be clear.)
1 lb 14 oz ripe freestone peaches, peeled and sliced
4 to 5 drops almond extract
1/2 cup sugar
Pastry for 9-inch single crust pie
Adjust rack 5-6 inches from bottom of oven. Start oven 10 minutes before baking; set to moderately hot (425F).
Crumble: Blend flour and brown sugar in a bowl, add butter and cut in with pastry blender or 2 knives until particles are the size of peas. Chill until needed.
Pastry and Filling: Make pastry; roll out and line a 9-inch pie pan, fitting well into angles. Let rest 5 minutes, then trim off 1/2 inch beyond pan rim. Fold overhang under so fold is even with pan rim. Flute edges with fingers or crimp with tines of fork. Blend the 1/4 cup sugar with the flour (or cornstarch) and sprinkle over bottom of pastry. Turn prepared peaches into pastry-lined pan, leveling evenly. Sprinkle with almond extract, then with the 1/2 cup sugar, then with the crumble.
Bake 15 minutes, then reduce heat to moderate (350F) and bake 20 minutes longer. Remove to cake rack and cool 2-3 hours. Serve lukewarm or cold.
Makes 6 servings.
This pie was heavenly. I didn't weigh myself this morning...ignorance is bliss.
Now, if you have never eaten a ripe-from-the-tree Michigan Red Haven peach...so sorry for you. They are the BEST in the world (my apologies to Georgia). And peaches are my favorite fruit. So...I ate and ate and ate. I lost track of how many peaches I've yummed down in the past week. I know I shouldn't feel too guilty...I mean, they're PEACHES...not Ben and Jerry's, right? But those carbs still add up...and as a result, I've gained a couple of pounds. Not the direction I want to be going.
So...yesterday I froze the remaining fruit so that we can enjoy their deliciousness during the Winter. And, I made a pie. From my Mom's Modern Encyclopedia of Cooking, by Meta Given...circa 1959:
PEACH CRUMBLE PIE
Crumble:
3/4 cup all-purpose flour
1/3 cup moist light brown sugar, packed
1/3 cup firm butter
Filling:
1/4 cup sugar
1 to 1 1/2 tbsp flour (I used 1 tbsp cornstarch, because I like the juices to be clear.)
1 lb 14 oz ripe freestone peaches, peeled and sliced
4 to 5 drops almond extract
1/2 cup sugar
Pastry for 9-inch single crust pie
Adjust rack 5-6 inches from bottom of oven. Start oven 10 minutes before baking; set to moderately hot (425F).
Crumble: Blend flour and brown sugar in a bowl, add butter and cut in with pastry blender or 2 knives until particles are the size of peas. Chill until needed.
Pastry and Filling: Make pastry; roll out and line a 9-inch pie pan, fitting well into angles. Let rest 5 minutes, then trim off 1/2 inch beyond pan rim. Fold overhang under so fold is even with pan rim. Flute edges with fingers or crimp with tines of fork. Blend the 1/4 cup sugar with the flour (or cornstarch) and sprinkle over bottom of pastry. Turn prepared peaches into pastry-lined pan, leveling evenly. Sprinkle with almond extract, then with the 1/2 cup sugar, then with the crumble.
Bake 15 minutes, then reduce heat to moderate (350F) and bake 20 minutes longer. Remove to cake rack and cool 2-3 hours. Serve lukewarm or cold.
Makes 6 servings.
This pie was heavenly. I didn't weigh myself this morning...ignorance is bliss.
Labels:
What's Cookin'?
Saturday, August 13, 2011
Magic Beans
I have a confession to make. In spite of what I may have led you to believe, I have been...for most of my life, anyway...a disinterested vegetable gardener. Oh, I've always grown tomatoes...even when I was single...because my Dad always grew them and it just wouldn't be Summer without fresh tomatoes from the garden. And I always had a row or two of lettuce...and a few green beans. But...I HATE the heat of high Summer...and so by this time of the year, any veggies I had managed to grow had usually succumbed to the lack of attention. I would look after my flowers...but the veggies...meh.
However, in the past couple of years I've jumped on the home-grown bandwagon. And this year...since we've been following the Atkins eating plan, with it's HUGE emphasis on fresh vegetables...I decided to make a special effort to coddle the kitchen garden. I was especially pleased with my green beans...which kept me busy blanching and freezing through most of July. A couple of weeks ago, I noticed they were waning...the plants withering...and although they were still producing a few beans, they were quite small. My plan was to pull up the plants and replace them with a Fall crop of broccoli. Then we got slammed by the heat again...and since my broccoli seedlings were nowhere near ready for the garden, I procrastinated. Every time I went out to water the tomatoes and peppers, I would water the beans as well...because I felt sorry for them.
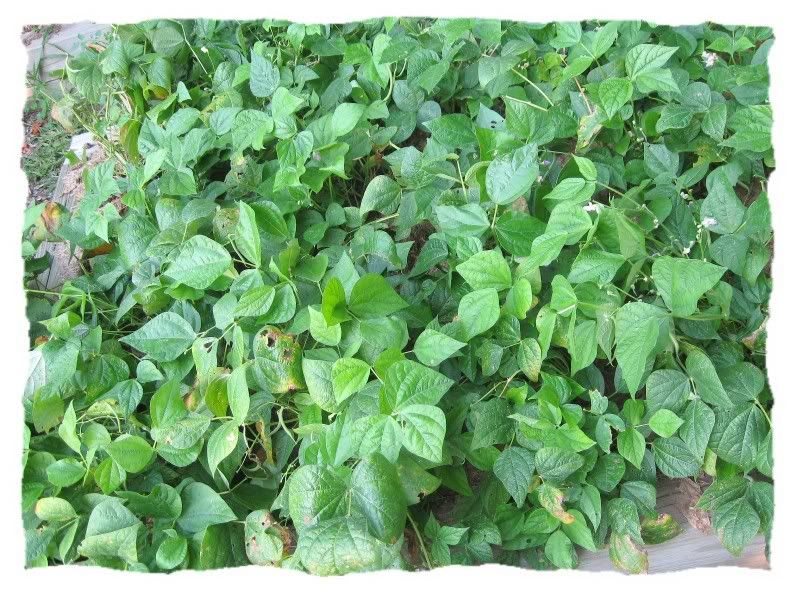
Well...a few days ago, I went out to the garden and was greeted by this:
The bean plants had come to life...with fresh new leaves...
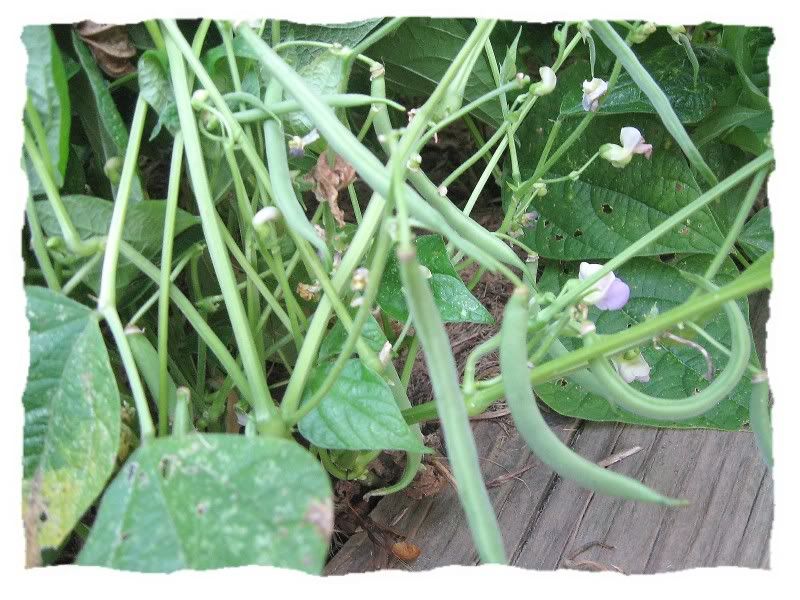
...and loads of blossoms and tender young beans underneath! I'll just bet you experienced gardeners out there are LOLing right now...but I had no idea green beans did this! We're having a Bean-O-Rama this year...TWICE!!
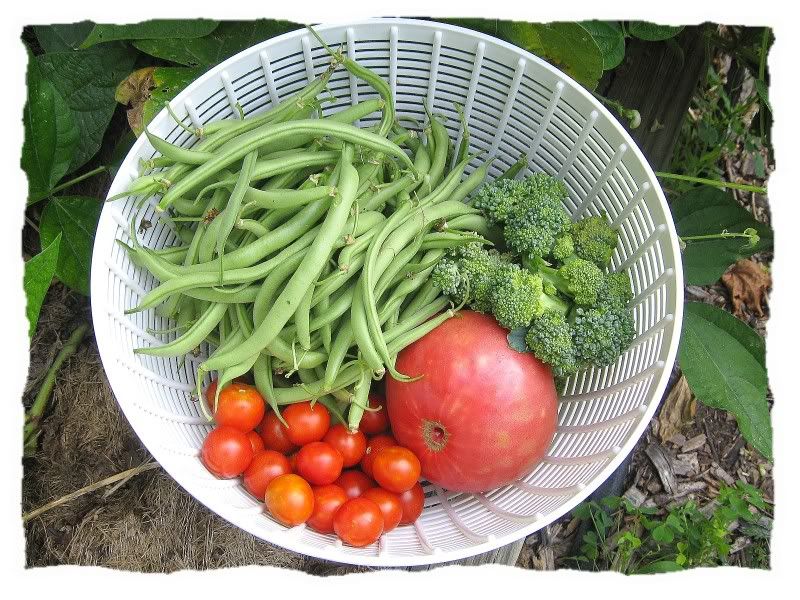
Here's the haul from this morning...cherry tomatoes, "Soldacki" Polish heirloom tomato, a big handful of broccoli shoots...and a whole bunch of green beans.
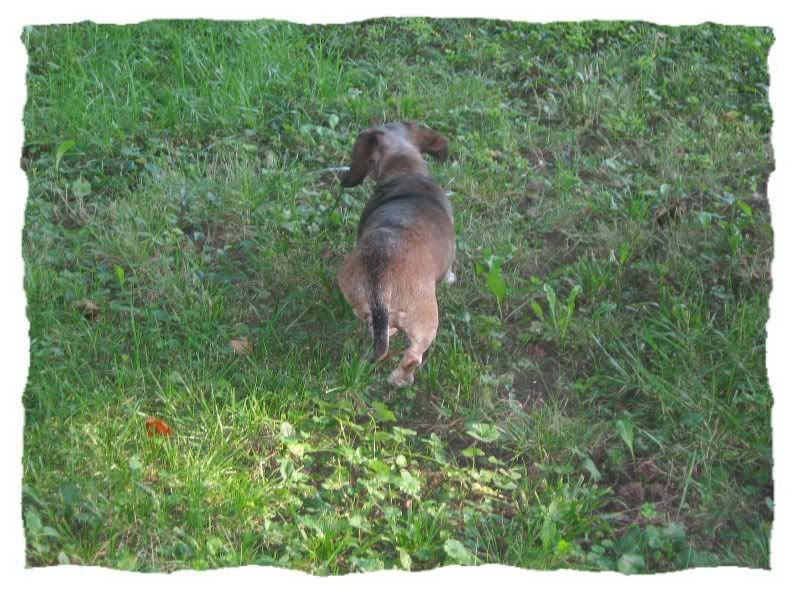
My camera-shy assistant, Sammy...leading the way back to the house. She had been posing adorably in the grass until she saw the camera in my hand. (Stinker!) She's the litter-mate to Bonnie and Clyde...and is my In-law's pupper. She spent the night here with her brother and sister...who chose to stay in bed while she and I made the rounds in the garden.
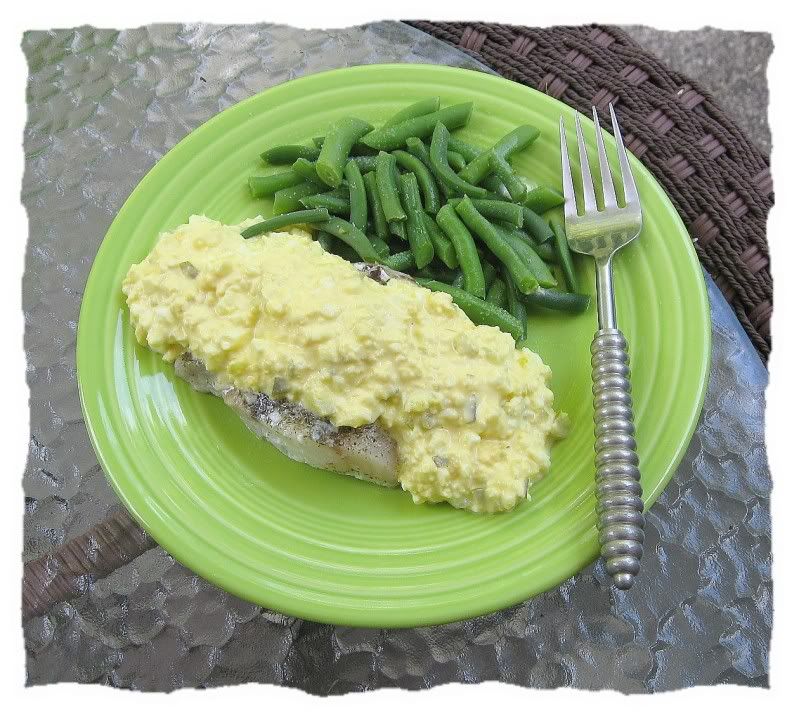
And here's my breakfast! Atkins advocates the incorporation of veggies into all meals...and encourages thinking outside the box...which can make for some unusual combinations. This morning, I had a lemon-butter Cod fillet (left over from last night)...topped with egg salad...with a side of freshly-picked green beans. And it was yummy!
Thank you for visiting with me today. I've been away from blogland for a bit and I've missed you! I hope you'll stop by again next week...as I hope to have some sewing projects to show you...and a post about my latest weekend getaway with The Mailman...as well as the continuation of our 2010 Scotland trip. We're going to Skye!
However, in the past couple of years I've jumped on the home-grown bandwagon. And this year...since we've been following the Atkins eating plan, with it's HUGE emphasis on fresh vegetables...I decided to make a special effort to coddle the kitchen garden. I was especially pleased with my green beans...which kept me busy blanching and freezing through most of July. A couple of weeks ago, I noticed they were waning...the plants withering...and although they were still producing a few beans, they were quite small. My plan was to pull up the plants and replace them with a Fall crop of broccoli. Then we got slammed by the heat again...and since my broccoli seedlings were nowhere near ready for the garden, I procrastinated. Every time I went out to water the tomatoes and peppers, I would water the beans as well...because I felt sorry for them.
Well...a few days ago, I went out to the garden and was greeted by this:
The bean plants had come to life...with fresh new leaves...
...and loads of blossoms and tender young beans underneath! I'll just bet you experienced gardeners out there are LOLing right now...but I had no idea green beans did this! We're having a Bean-O-Rama this year...TWICE!!
Here's the haul from this morning...cherry tomatoes, "Soldacki" Polish heirloom tomato, a big handful of broccoli shoots...and a whole bunch of green beans.
My camera-shy assistant, Sammy...leading the way back to the house. She had been posing adorably in the grass until she saw the camera in my hand. (Stinker!) She's the litter-mate to Bonnie and Clyde...and is my In-law's pupper. She spent the night here with her brother and sister...who chose to stay in bed while she and I made the rounds in the garden.
And here's my breakfast! Atkins advocates the incorporation of veggies into all meals...and encourages thinking outside the box...which can make for some unusual combinations. This morning, I had a lemon-butter Cod fillet (left over from last night)...topped with egg salad...with a side of freshly-picked green beans. And it was yummy!
Thank you for visiting with me today. I've been away from blogland for a bit and I've missed you! I hope you'll stop by again next week...as I hope to have some sewing projects to show you...and a post about my latest weekend getaway with The Mailman...as well as the continuation of our 2010 Scotland trip. We're going to Skye!
Labels:
Atkins,
What's Cookin'?,
What's Growing
Friday, July 1, 2011
Shrimp Scampi
I'm a lot like Forrest Gump's friend, Bubba. I love shrimp. Boiled shrimp, fried shrimp, sauteed shrimp, coconut shrimp, shrimp salad...well...you get the idea. Tonight, we had Shrimp Scampi. This easy-peasy dish is a breeze to prepare...and it's absolutely delicious!
SHRIMP SCAMPI Serves 4 (or 2, at our house)
1 lb medium shrimp (peeled and de-veined)
2 Tbsp olive oil (not extra virgin), separated
2 Tbsp finely chopped fresh garlic
1 1/2 cups white wine (I like Barefoot Chardonnay.)
1 tsp Italian seasoning
1/2 cup butter (softened)
1 Tbsp finely chopped fresh parsley
Cooked pasta
Grated Parmesan cheese
Heat 1 tablespoon of the oil in a heavy-bottomed skillet. Add shrimp and cook, stirring, until tender and no longer translucent (this won't take long).
Remove shrimp from pan and keep warm. Reduce heat slightly. Add remaining tablespoon of oil to the pan. Add garlic and cook 1-2 minutes. Do not allow garlic to brown as this will produce a slightly bitter flavor.
When garlic is tender, add white wine and allow to boil and reduce by half. Add Italian seasoning.
Reduce heat to low and SLOWLY add butter, one tablespoon at a time. The butter should melt gently into the sauce, creating a creamy texture. Be careful. If the pan is too hot, the butter will separate.
Add shrimp back into the sauce and stir in parsley.
Serve with fresh pasta and grated Parmesan cheese.
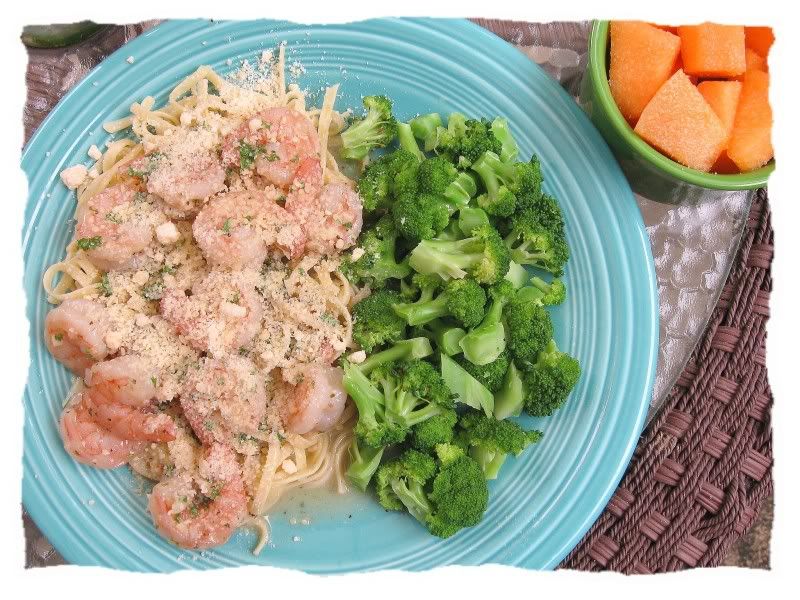
This is delicious with a side of steamed broccoli...just nestle the broccoli up to the Scampi and let some of the yummy garlic-butter sauce slosh over it.
And...for dessert...how about some sweet cantaloupe chunks, with a sprinkling of sea salt?
This makes a great summertime meal...and utilizes some of the delicious produce that's in season right now. And for a shrimp-lover like me, it's da bomb!
SHRIMP SCAMPI Serves 4 (or 2, at our house)
1 lb medium shrimp (peeled and de-veined)
2 Tbsp olive oil (not extra virgin), separated
2 Tbsp finely chopped fresh garlic
1 1/2 cups white wine (I like Barefoot Chardonnay.)
1 tsp Italian seasoning
1/2 cup butter (softened)
1 Tbsp finely chopped fresh parsley
Cooked pasta
Grated Parmesan cheese
Heat 1 tablespoon of the oil in a heavy-bottomed skillet. Add shrimp and cook, stirring, until tender and no longer translucent (this won't take long).
Remove shrimp from pan and keep warm. Reduce heat slightly. Add remaining tablespoon of oil to the pan. Add garlic and cook 1-2 minutes. Do not allow garlic to brown as this will produce a slightly bitter flavor.
When garlic is tender, add white wine and allow to boil and reduce by half. Add Italian seasoning.
Reduce heat to low and SLOWLY add butter, one tablespoon at a time. The butter should melt gently into the sauce, creating a creamy texture. Be careful. If the pan is too hot, the butter will separate.
Add shrimp back into the sauce and stir in parsley.
Serve with fresh pasta and grated Parmesan cheese.
This is delicious with a side of steamed broccoli...just nestle the broccoli up to the Scampi and let some of the yummy garlic-butter sauce slosh over it.
And...for dessert...how about some sweet cantaloupe chunks, with a sprinkling of sea salt?
This makes a great summertime meal...and utilizes some of the delicious produce that's in season right now. And for a shrimp-lover like me, it's da bomb!
Labels:
What's Cookin'?
Friday, June 10, 2011
Iced Vanilla Coffee
Several years ago...I would say at least ten...The Mailman and I were on vacay in the Seattle area. We ran into a grocery store to pick up some road food...and stumbled across Starbuck's Frappuccino's...you know, the ones in the four-pack that look like little milk bottles. Now, this was WAY before there was a Starbuck's on every corner. In fact, I would venture to say that the majority of Hoosiers had never even HEARD of Starbuck's. Intrigued, we bought a four-pack...and an addiction was born.
Upon our return home, I was devastated to discover that our grocery stores did not carry these little yummies. Sadly and eventually, I forgot about them. Until a couple of years later...at the Kroger's...there they were! Well, I snapped them right up...and before I knew it...I had a two-pack a week habit! Now, as good as these are...they contain terrifying amounts of sugar...and at six to seven dollars a pop, they were breaking our food budget. I knew I had to change my ways. So...I decided to make my own!
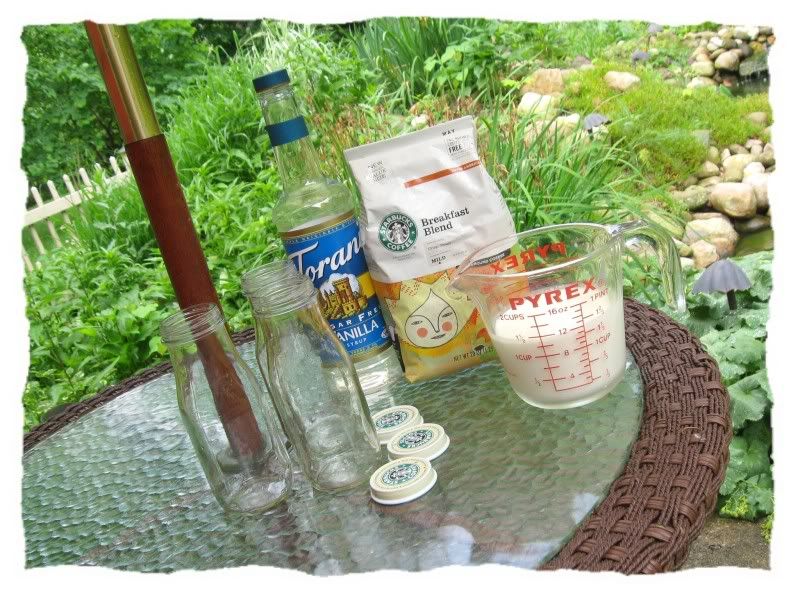
Here's my recipe:
Brewed coffee (I like Starbuck's Breakfast Blend)
Sugar-Free Vanilla Syrup
Heavy Whipping Cream
Little glass bottles with lids...saved from when I used to drink the "real" stuff!
(Please excuse the dead-heads in the background. The mosquitoes have me cornered in the house...too chicken to go out and tend the garden.)
Pour 2 Tbsp of vanilla syrup and 2 Tbsp of cream into each bottle...and fill the remainder up with coffee. Put on the lids...shake and refrigerate. Serve over ice and enjoy every sip!
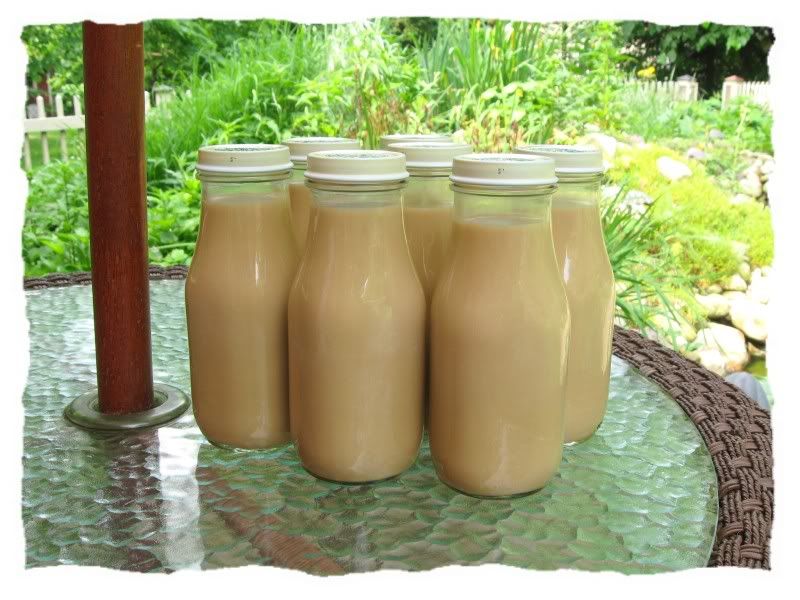
My 12-cup coffee maker makes enough for 7 of these...which should last me a week...but usually doesn't!
My Father-In-Law calls this "counterfeit coffee"...but I actually like mine better than the real thing. They're more coffee-y...and so much healthier!
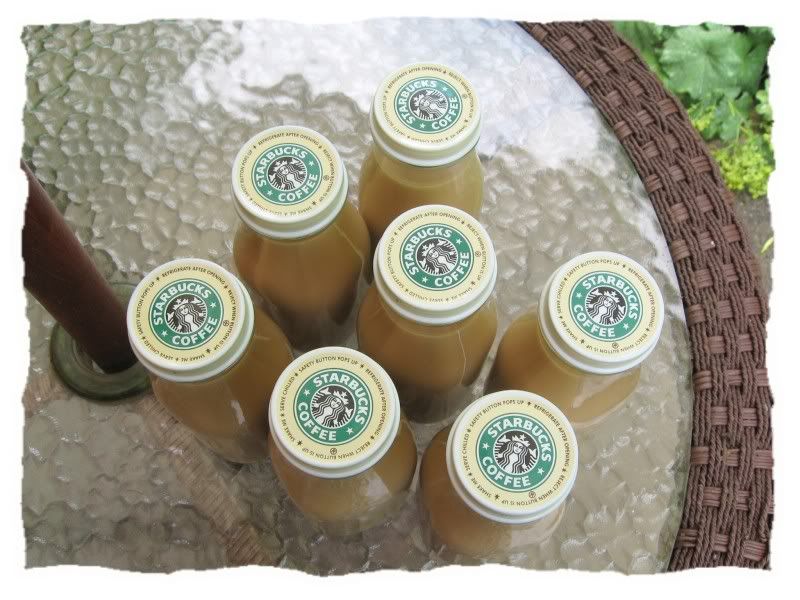
The little bottles make them perfect to "grab and go." If I'm going out of town, I always take one with me to sip in the car.
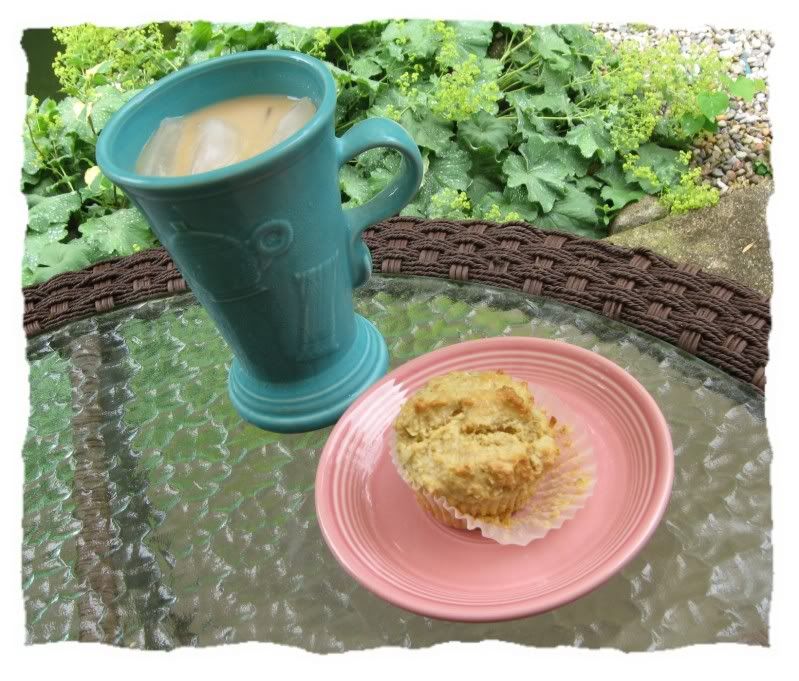
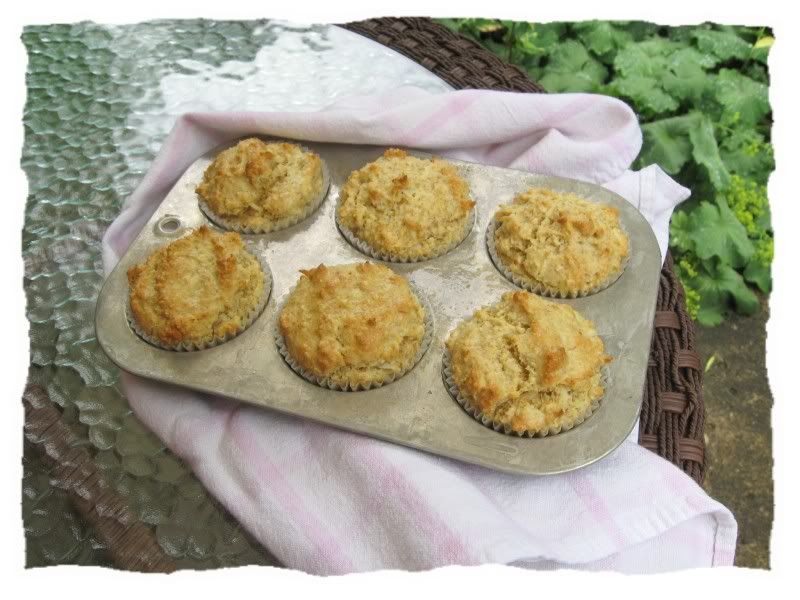
Of course...you'll need something to enjoy WITH your coffee...and one of my favorite go-with's are these "Coconut Macaroon Muffins." You can find the recipe here. They're low-carb...full of healthy fats...and absolutely delish!
Happy Caffeine-Friday, my friends!
Upon our return home, I was devastated to discover that our grocery stores did not carry these little yummies. Sadly and eventually, I forgot about them. Until a couple of years later...at the Kroger's...there they were! Well, I snapped them right up...and before I knew it...I had a two-pack a week habit! Now, as good as these are...they contain terrifying amounts of sugar...and at six to seven dollars a pop, they were breaking our food budget. I knew I had to change my ways. So...I decided to make my own!
Here's my recipe:
Brewed coffee (I like Starbuck's Breakfast Blend)
Sugar-Free Vanilla Syrup
Heavy Whipping Cream
Little glass bottles with lids...saved from when I used to drink the "real" stuff!
(Please excuse the dead-heads in the background. The mosquitoes have me cornered in the house...too chicken to go out and tend the garden.)
Pour 2 Tbsp of vanilla syrup and 2 Tbsp of cream into each bottle...and fill the remainder up with coffee. Put on the lids...shake and refrigerate. Serve over ice and enjoy every sip!
My 12-cup coffee maker makes enough for 7 of these...which should last me a week...but usually doesn't!
My Father-In-Law calls this "counterfeit coffee"...but I actually like mine better than the real thing. They're more coffee-y...and so much healthier!
The little bottles make them perfect to "grab and go." If I'm going out of town, I always take one with me to sip in the car.
Of course...you'll need something to enjoy WITH your coffee...and one of my favorite go-with's are these "Coconut Macaroon Muffins." You can find the recipe here. They're low-carb...full of healthy fats...and absolutely delish!
Happy Caffeine-Friday, my friends!
Labels:
What's Cookin'?
Subscribe to:
Posts (Atom)