If you take even a brief look around this blog...you'll soon discover that I'm a gardener. I never fail to be completely gob-smacked (my favorite British expression) by the miracle of a flower. I miss my garden in the Winter.
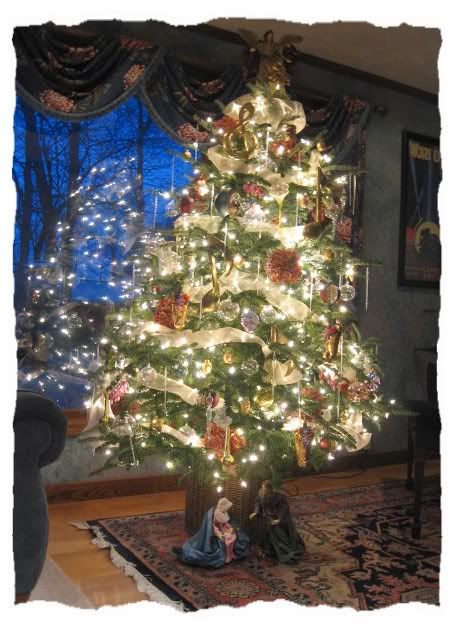
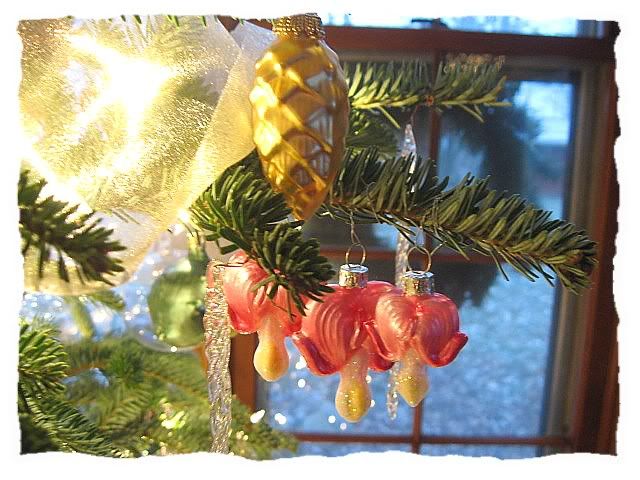
And so...years ago, I began to collect glass Christmas ornaments with a fruit and flower theme...to bring a little of the garden miracle into our Christmas celebration. Every year, The Mailman and I head down to the cutest little local tree lot...and select a fresh Michigan-grown Frazier Fir to display my growing collection. TM (with the patience of a saint) sets it up for me in a five-gallon bucket...anchored with field stones...filled with water...and disguised with a wicker basket.
Tiny white lights...a sheer golden garland...sparkling clear glass icicles and balls...and silk hydrangea blooms form the foundation for my Gardener's Christmas Tree.
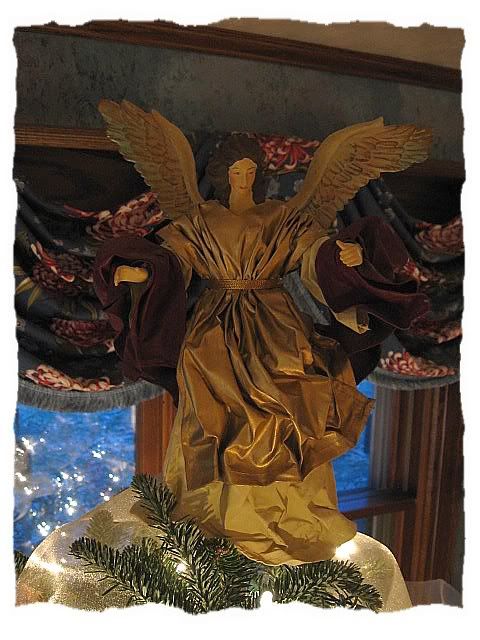
My beloved Clothique angel. I've had her for at least 30 years...and she hasn't aged a bit!
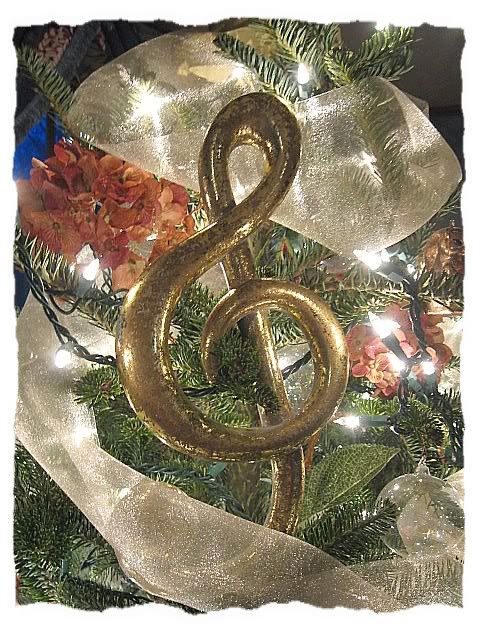
A great big golden treble clef...and three matching eighth-notes...since we LOVE traditional Christmas music. (I'm talking Vienna Boys' Choir here...NOT Alvin and the Chipmunks!)
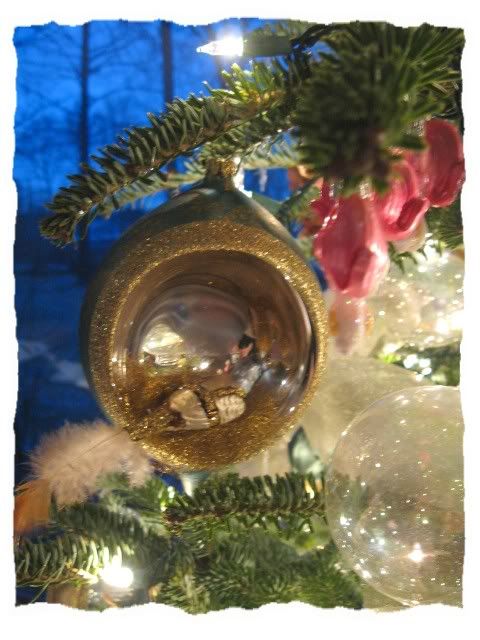
A sweet little bird nests inside a mirrored blue ball. Did you know it's "good luck" to have a bird's nest in your Christmas tree? I'm not a big believer in luck...but I always give this little bird a prominent position...just in case!
Glittering golden cornucopias filled with fruit. These are the first ornaments I purchased...long before I even had a garden!
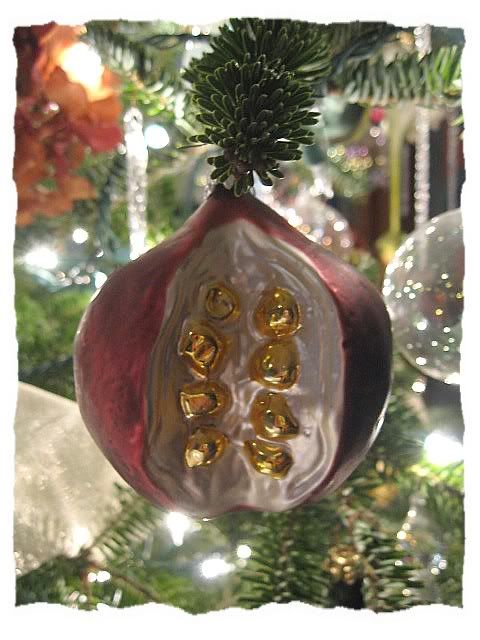
Beautiful burgundy-rose pomegranates.
Blue and lavender pansy blossoms...and green pistachio nuts. At least that's what I think they are.
Golden pine cones...circa 1990's from Eddie Bauer. There are also ball ornaments, mushrooms and walnuts in this set...all glass.
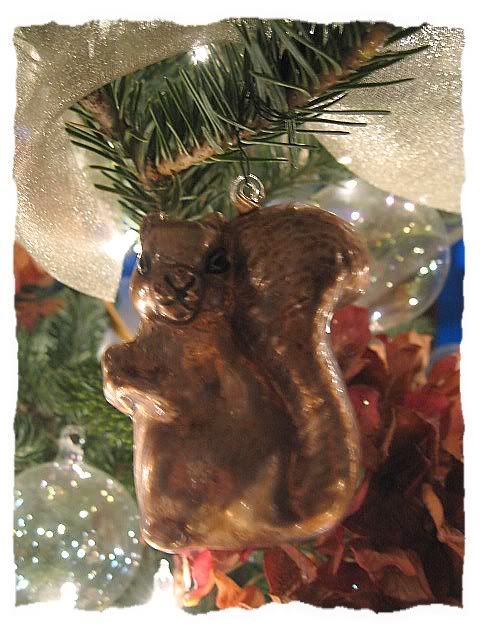
A sneaky little squirrel has found his way into the mix. Probably after my pistachios and walnuts!
Snowy white amaryllis...a Christmas classic.
Pink Bleeding Heart, from a couple of years ago...my newest addition.
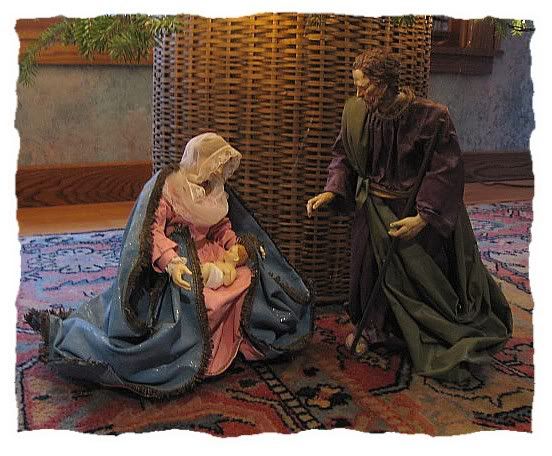
And at the base...The Holy Family...another treasured Clothique creation from Possible Dreams. When I purchased these...probably in the late '80's or early '90's...there was also a Shepherd and Wise Men to make a complete Nativity. But...budget did not permit. And now...they are nowhere to be found.
This year...I have my eye on some little glass birds...Cardinals, Goldfinches, Chickadees...just like the ones that visit the feeders outside this window.
And even though we aren't big on Christmas gifting in our family...I think our tree looks a bit "naked" underneath. So...I'm planning to wrap some empty boxes with a beautiful Hallmark angel-themed gift paper I've been hoarding for years...accented with velvet bows and old sheet music. If I finish this project (BIG IF), I'll post a picture! And there you have it...a Gardener's Christmas Tree! Thank you for allowing me to share it with you!
Yesterday afternoon, it snowed. Big, wet, HEAVY white flakes. And it piled up FAST. I was in the midst of setting up my Snow Village collection in the family room bookcase...amused that the weather outside coordinated beautifully with the little vignettes I was assembling. I like things like that.
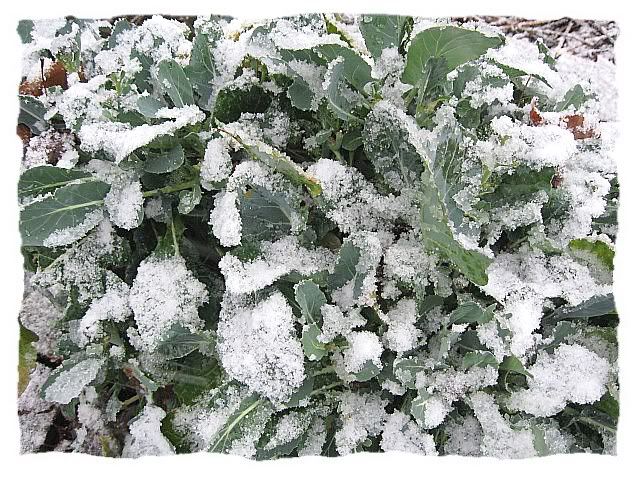
Suddenly, I remembered the broccoli I had intended to pick several days ago. Since the forecast is calling for some frigid temps, I thought I'd better hightail it out there. So...I grabbed my old coat and The Mailman's ball cap and out I went. As you can see...my raised broccoli bed is "floating" from the heavy rain a few days ago...
...and the plants were being quickly covered with snow.
So...I brushed away the slush...and there they were...green and succulent. Does anyone else find this miraculous? These same plants have been producing steadily for six months!
I managed to gather a nice little amount...and TM and I will enjoy one last helping of home-grown broccoli...steamed...with plenty of butter and salt.
I'm going to miss my little broccoli bed this Winter...but I'm consoled by the fact that the 2012 seed catalogs are already arriving. Hmmm...time to start dreaming...what to plant...what to plant...
Let me begin by saying that I have mixed feelings about Halloween. Neither The Mailman nor I grew up with trick-or-treating and costumes and parties and all of that...and we don't have children of our own...so Halloween is not something we "celebrate." That said, we have some very cute neighborhood kids that think we're pretty cool (imagine that!)...and so I try to make their annual extortion outing a pleasant experience for them and their parents. Plus...Bonnie and Clyde love all the excitement!
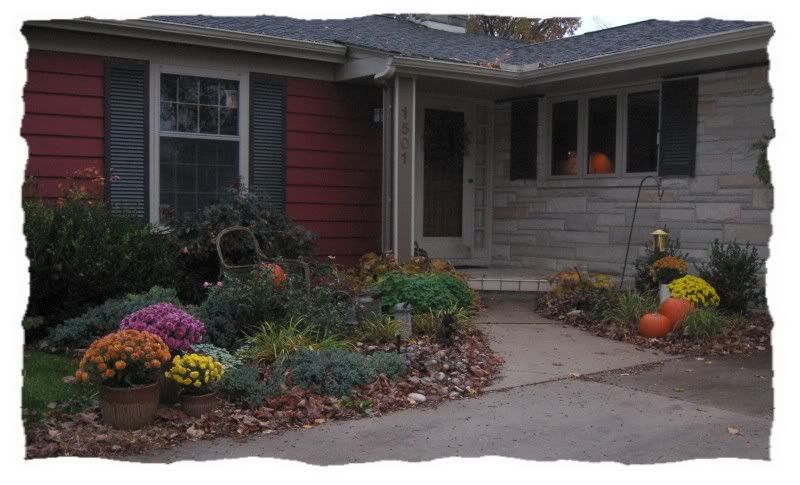
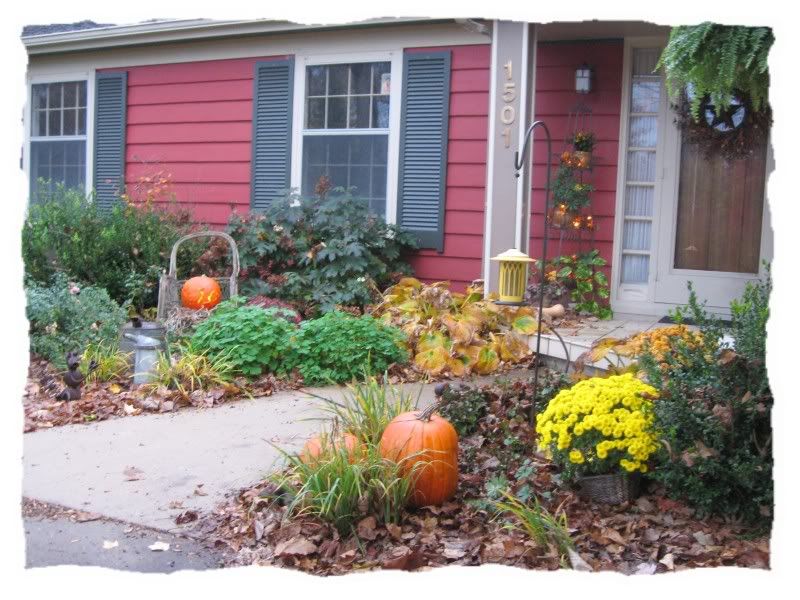
Halloween at our house tends to harvest-themed, with pumpkins and chrysanthemums...and lots of dry leaves scattered about because I'm too lazy to rake them for atmosphere.
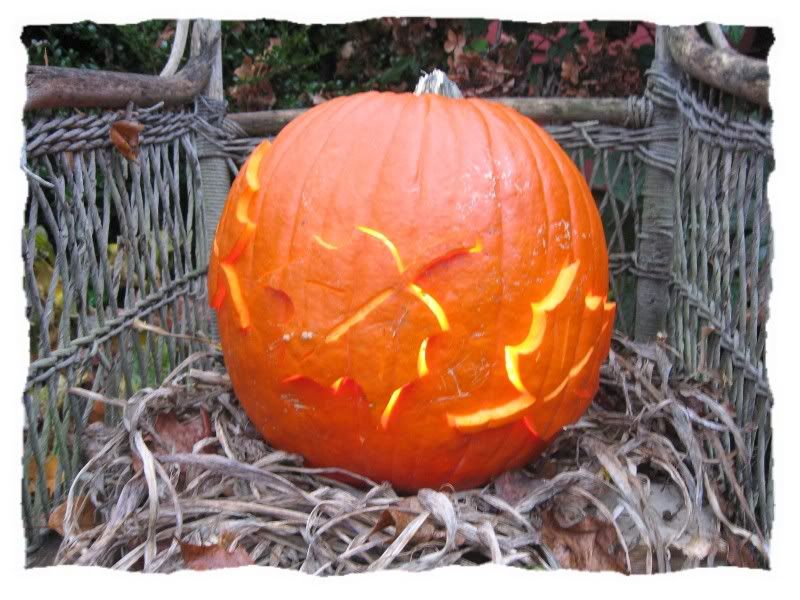
I'm not into scary Jack O'Lanterns, but I do like carved pumpkins...so I usually do something seasonal. This is a simplified version of a technique I learned from Sunset Magazine years ago. I hollowed out the pumpkin...cut out three Maple leaf shapes...and pushed them halfway out. I inserted a string of outdoor mini lights...cut a smallish hole in the back (bottom)...threaded the plug through...and cut another small hole (top) to let the heat escape. Et Voila! Adult pumpkin!
And here's our little Butternut Squash Weenie Dog! I bought the metal cutouts several years ago...and he's become a Halloween tradition on our porch.
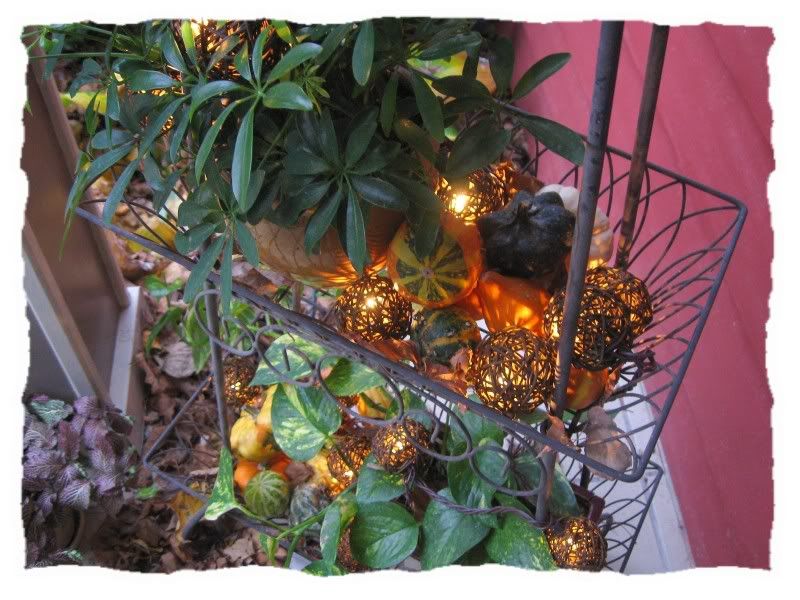
I have a tiered plant stand on the porch that stays out 9 months a year. In the Fall, I dress up the Summer planting with colorful gourds and these grapevine mini lights that I found a couple of years ago on clearance at Menard's.
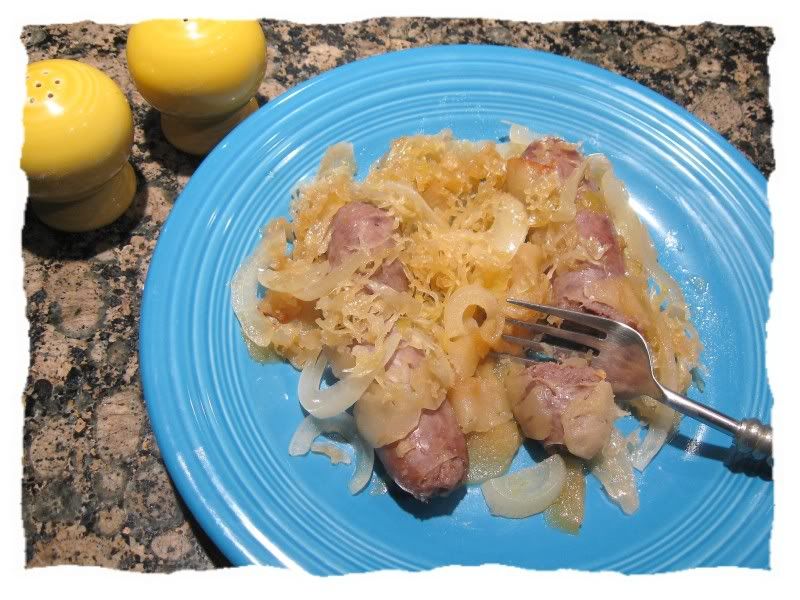
Of course, with all the goblins banging on the door, there's not much time to cook. So...we'll have something simple like these Bratwurst packets. Simply fill a foil pouch with Bratwurst, sauerkraut, sliced onion, sliced apple and a sprinkling of brown sugar. Place in a 350 degree oven and bake for 1 1/4 hours. Easy-peasy! And you don't need anything else with it...unless...
...it's a pumpkin cookie! My friend, Kimberly blogged about these yesterday...and I just HAD to try them. I especially had fun with the icing. It's drizzled from a fork...which I had never done before. At first, I tried to be careful and perfect...and it wasn't working...so I just decided to go all Jackson Pollock and I think they look great! They're fabuloso...so much so that the kids will be getting these instead. (Guiltily wipes cookie crumbs from face.)
Now...bring on those little hooligans! We're ready. I just hope there isn't too much chocolate left over...know what I'm sayin'?
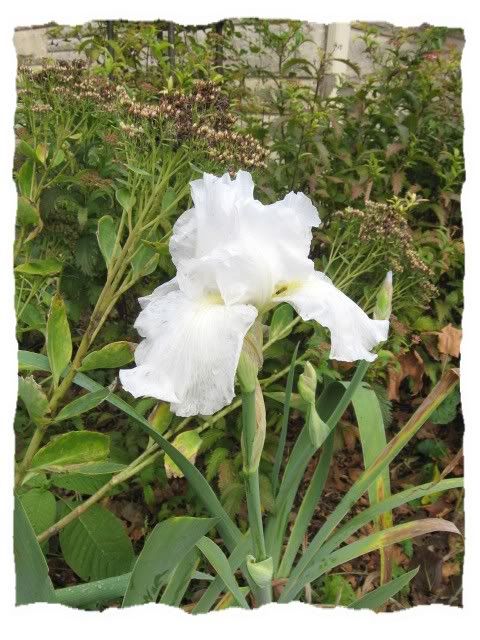
If you've been following me since last Spring, you know that my favorite flowers are the tall German Irises. I have lots of them in my garden...and last June, I blogged about them here. Well, a couple of them are re-bloomers...and have been blessing us with some beautiful blossoms in the cool Fall weather. This variety is called "Immortality"...and this is it's third bloom...with two more buds that will open if the weather doesn't get too terribly cold. Isn't it beautiful? I love the contrast between these delicate white petals and the faded foliage of the surrounding plants. One last bit of loveliness before the garden goes to sleep for the Winter.
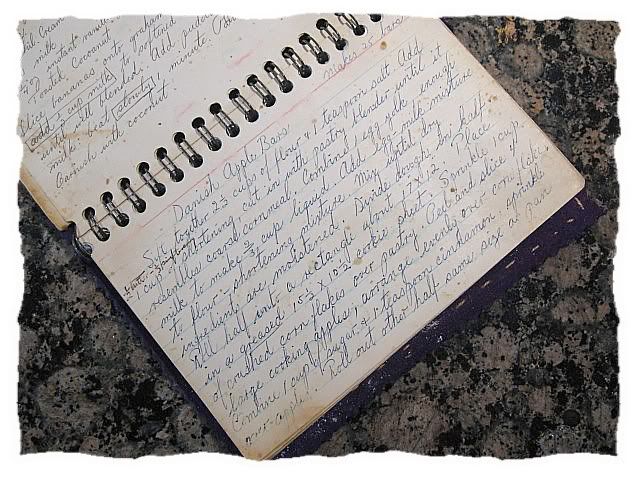
I suppose most of us...when we remember our Mothers in the kitchen...think of one special culinary creation that stands out from the others. See this recipe? This is mine. Danish Apple Bars. This was my Mother's specialty...the dish everyone requested...for birthdays...potlucks...you name it. I treasure this recipe, preserved in her own delicate handwriting...and whenever I make them, I think of her...and miss her. She was an amazing woman. Someday...when I have the time to do her justice...I'll introduce her to you. For now, I'll share her recipe with you.
DANISH APPLE BARS
Pastry:
2 1/2 cups sifted all-purpose flour 1 tsp salt 1/2 cup cold butter 1/2 cup vegetable shortening (aka Crisco) 1 egg, separated milk 4 or 5 large cooking apples, cored, peeled and sliced extremely thin (you may want to use a mandolin-thingy) 1 cup crushed cornflakes 1 cup sugar 1 tsp cinnamon
Icing:
1 cup powdered sugar 2 tbsp water 1/2 tsp vanilla
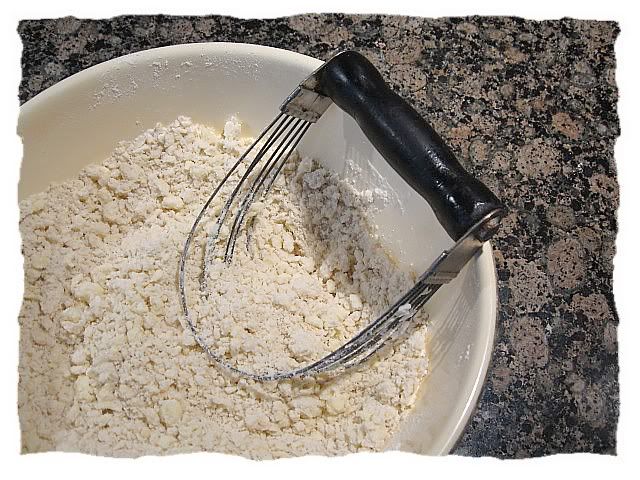
Sift together the flour and salt. Using a pastry blender, cut in the butter and shortening until it resembles coarse cornmeal. (I never get it that fine, but that's OK. This dough is very forgiving.)
Combine the egg yolk with enough milk to make 2/3 cup liquid. Add to the flour-shortening mixture and stir until moistened.
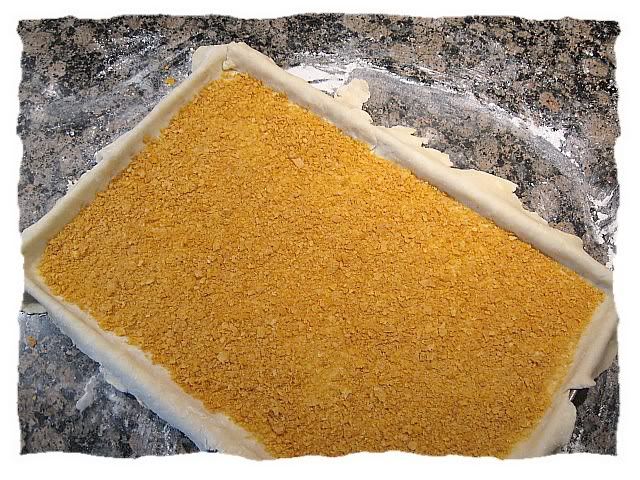
Roll out half the dough into a rectangle about 17" X 12". Place in a 15 1/2" X 10 1/2" jelly roll pan...letting excess dough hang over edges.
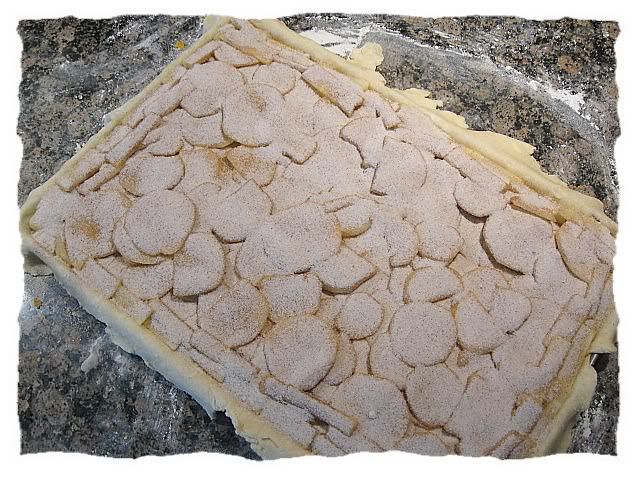
Sprinkle crushed cornflakes over dough.
Arrange apple slices evenly over cornflakes.
Combine sugar and cinnamon. Sprinkle over apples.
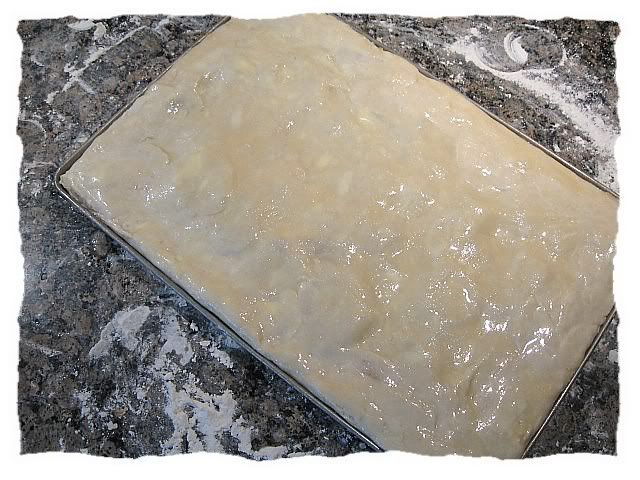
Roll out second half of dough to approximately the same size as the pan. Place over apples. Moisten edges with water. Bring the bottom dough up and over the top, press edges to seal (I stroke the edges with a moistened butter knife).
Beat the egg white until frothy and brush over the top of pastry.
Bake at 400 degrees for 30 minutes, with oven rack about 4 1/2" from the bottom of oven. Cool on rack.
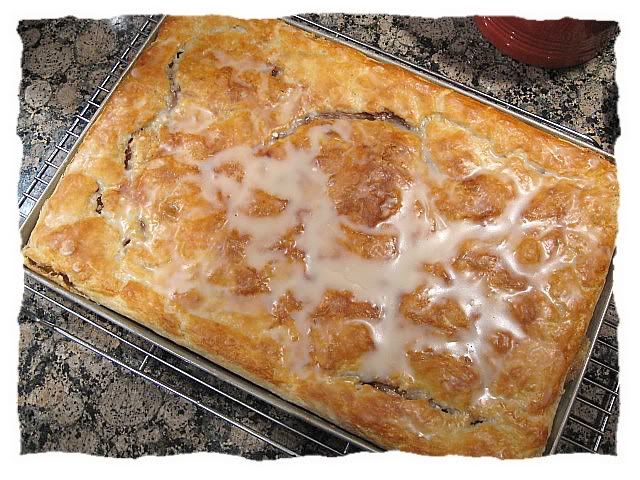
Here's a little peeky-peek at my kitchen, with the freshly baked bars cooling on the bake center. You'll notice that the bake center's top is granite...and a bit lower than the adjacent tile counter-top. We remodeled our kitchen several years ago...and I designed the bake center this way...just so I would have a comfortable place to make these. That's how much this recipe means to me.
When the bars are cool, combine the powdered sugar, water and vanilla. Spread over top of pastry.
Makes 25 absolutely deliciously decadent bars.
Now...put a couple of these on a pretty Fiestaware plate...grab a glass of ice-cold milk...and go watch "Dancing with the Stars." That's what I'm gonna do!
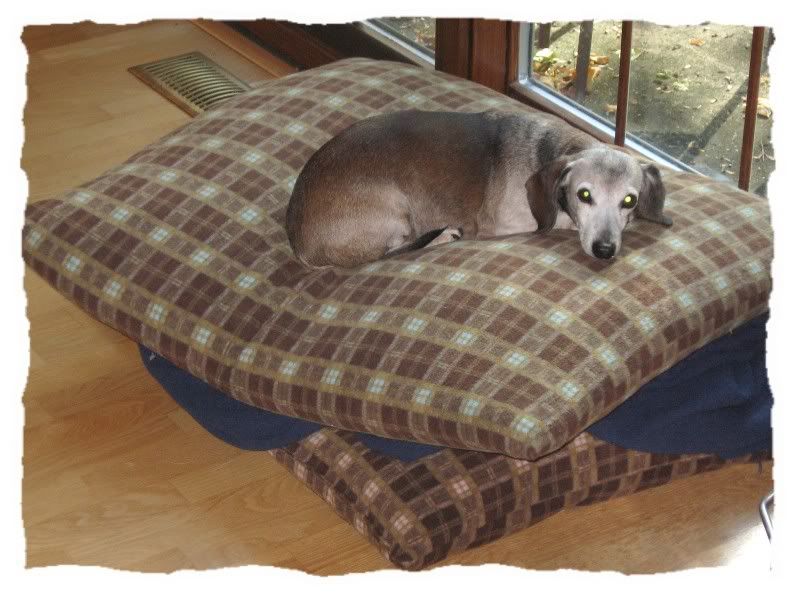
A nonstop flurry of activity around here during the past week or so, my friends. Tulip-planting, garage-cleaning, landscaping at the in-laws new condo...and leaves, leaves, LEAVES! And, of course...all these projects need supervision...which makes for one tired supervisor!
Here's "The Boogie," after a long, hard day. We had piled up the dogger's pillows and blankets in front of the door...and this is where I found him. He has always had the uncanny ability to find the most comfortable place in the house...and stake his claim. I don't care who you are...THAT'S cute!
Hello Circle-Skirter's! Are you ready for the party? A great big "Thank You" to Casey at Casey's Elegant Musings for organizing and leading this sew-along. If you haven't visited Casey's blog, I encourage you to do so. It's such a lovely place for inspiration...and if you're into vintage (even a little bit), you'll absolutely love it!
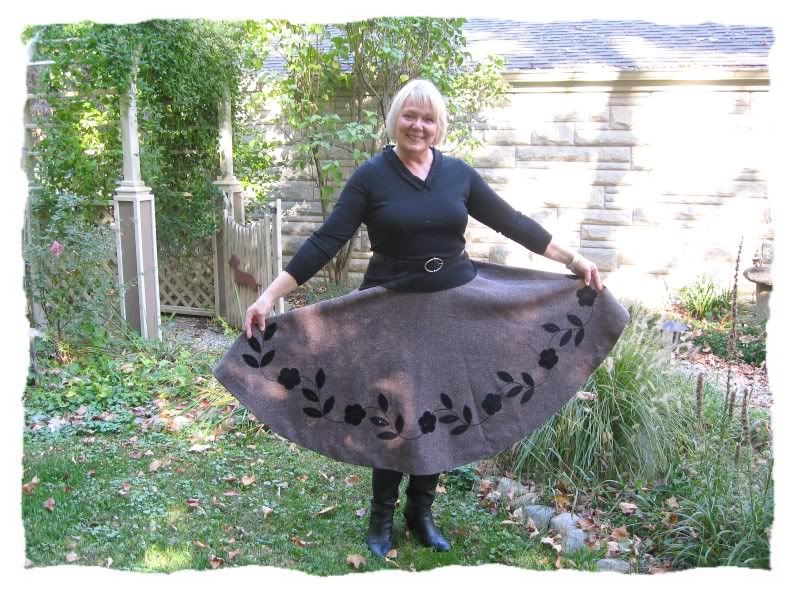
Here in Indiana, we're enjoying a bit of a heat wave...sort of a Pre-Indian-Summer-Summer, if you will. So...posing in a wool skirt and sweater made for quite a toasty experience, let me tell you! Add to that a bit of photography drama* (rant to follow, for those interested)...and, well...I hope I don't look too grouchy!
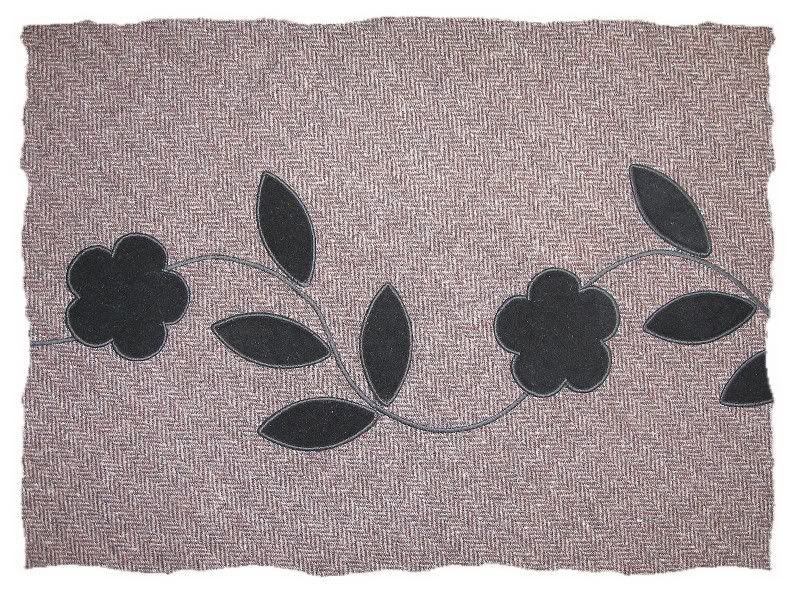
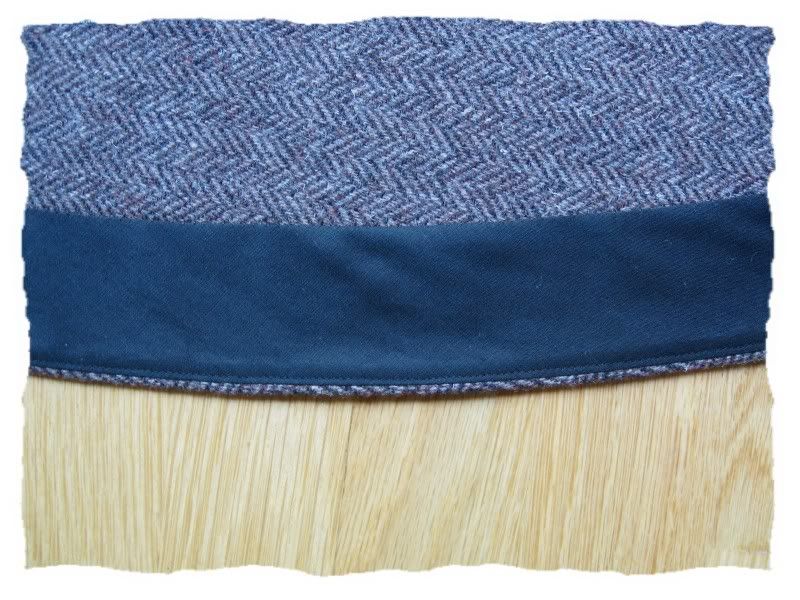
My KatyDidStitches Circle Skirt is made from a heavy brown herringbone tweed (garage sale find...4 yards for six dollars!)...and features a flower and vine motif in black velveteen applique...with beaded accents. You can read about it's construction here, here, hear and heeya.
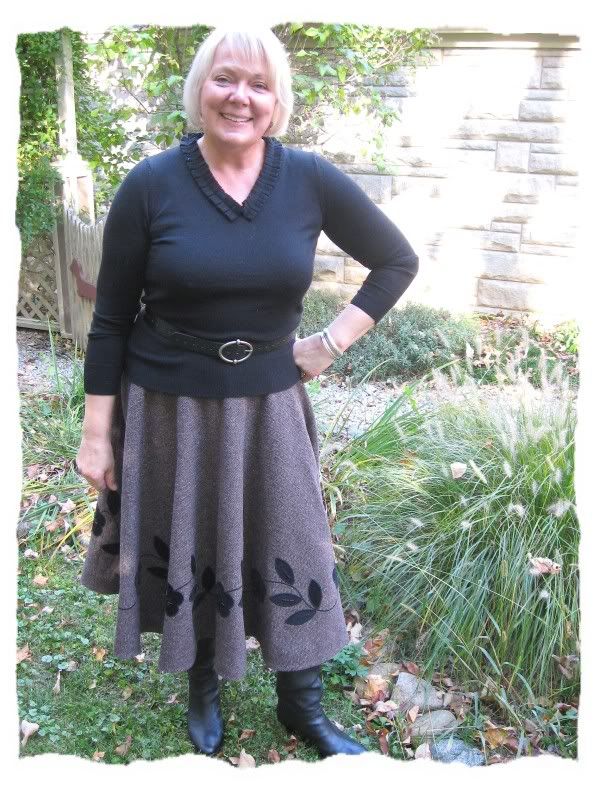
The obligatory hand-on-hip pose...makes one look slimmer, you know. Is it working?
I purchased this black sweater to go with my new skirt. I think I may be the only woman in America that didn't have one in her closet. Now I have exactly TWO black items in my wardrobe...my new sweater and my black boots...and I'm wearing them BOTH in this picture!
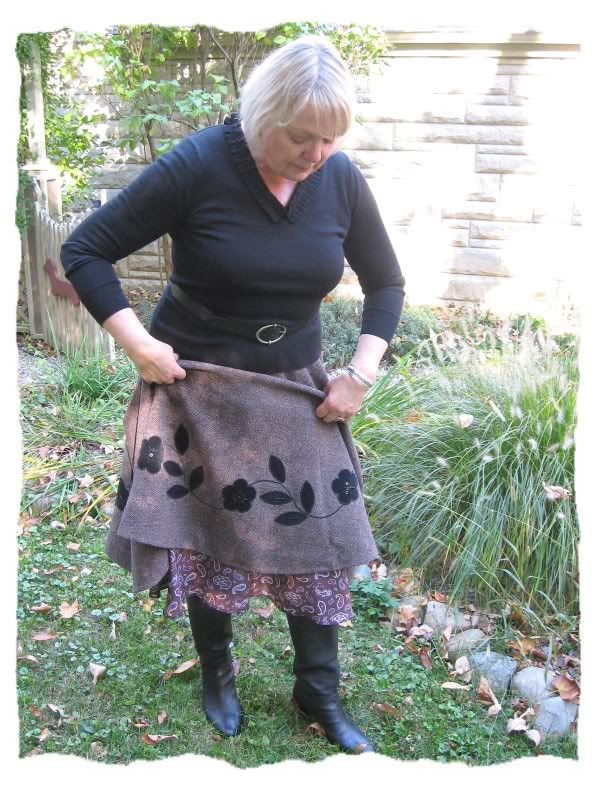
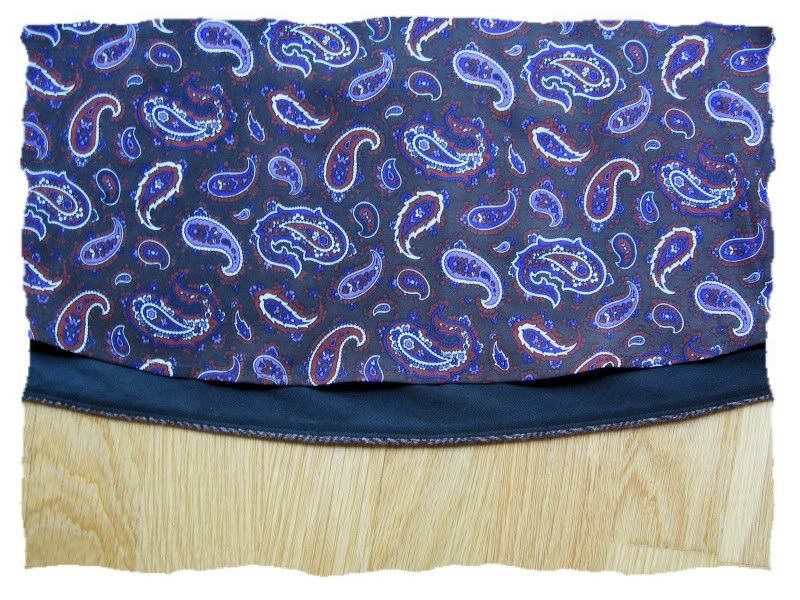
A pretty lining is a must for me...and I love this paisley silk...nice and swishy!
I'm looking forward to wearing my skirt this Winter. The Mailman and I don't attend a lot of sparkly Holiday parties (actually, NONE)...but I think this will be perfect for Christmas carols at the Honeywell Center, potluck suppers and Midnight Mass. And I hope it snows...a lot! So's I can twirl in the snow with my new Circle Skirt!
*And now for the rant. I've come to the conclusion that if I'm going to do very much of this (blogging about garment sewing)...I'd better learn how to take my own pictures. After struggling for HOURS with a tripod and timer...and not one usable photo to show for it...I enlisted TM's most unenthusiastic help. And got a total of FIVE shots. FIVE. And two of those because I asked for a retake. This from the man who has taken THOUSANDS of pictures of me. I'm serious. Thousands. Of course, I wasn't posing with a stuffed cowboy or holding up a bottle of snake oil or some other foolishness...and this photo op was not HIS idea...so it was a complete waste of his time. Evidently. Couldn't even manage a "You look nice." So...pressing out that little crease in the front and retaking the picture was out of the question. Same goes for changing my position so that the sun doesn't make my skirt appear to be tie-dyed. Perhaps I need to find a way to make this process enjoyable for him. More spandex, maybe?
There. I feel better now. And yes...he does read this blog. You may call me passive-aggressive.
Ahem. I'm delighted to say that my circle skirt is finished! And ahead of schedule. I'm quite impressed with myself...giddy, in fact. This is a minor miracle. If you could see the half-finished projects cluttering up my workroom...well, let's just say you'd understand.
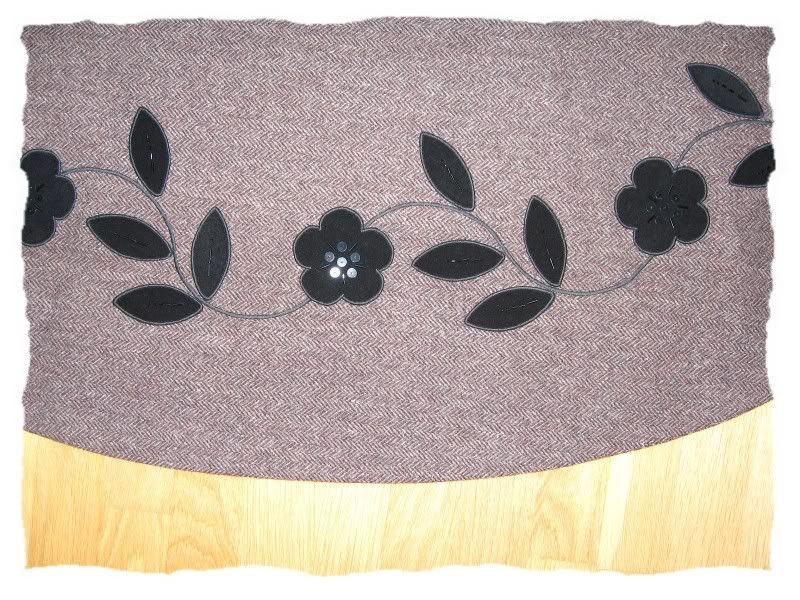
Here is the finished hem and applique. I hope you can see that I've embellished the velveteen vine with flat black sequins, black bugle beads and seed beads. I wanted to add a little sparkle...without being flashy about it. This was my first attempt at beading. I didn't plot out the design...because I wanted it to look casual and not too perfect...so I just kind of eyeballed it as I went along. And it worked. It's not perfect!
I used a purchased black bias hem facing to finish my hem. I wanted a little bit of subtle contrast to show as the skirt moves. This is my favorite way to finish a full hem...the bias allows any excess fullness to be steamed away...and the hem lies flat.
I considered horsehair braid...but I found that it added a surprising amount of body to the hem. I was amazed at this, because the tweed is quite heavy. A lovely effect it was, but too much fullness for me. If I was 30 years younger...heck yeah...DOUBLE horsehair.
I hand-stitched the skirt hem...and I finished the silk lining with a narrow double-fold hem...stitched by machine.
This lining fabric is not very photogenic, I'm afraid...or maybe it's the photographer. Ya think?
Now, I have to decide how to style this for the Circle Skirt Party...and persuade The Mailman to take my picture. I hope to see you there!
So yesterday, I went to a different grocery store. I dunno. I was bored with my usual Kroger and wanted a change. I went to the brand-spankin' NEW Kroger in Rochester. I was looking for ingredients for a crock-pot recipe...among them, Golden Delicious apples. Well, they had 'em...but they were very green...and not very appetizing. So I started shopping the other apples.
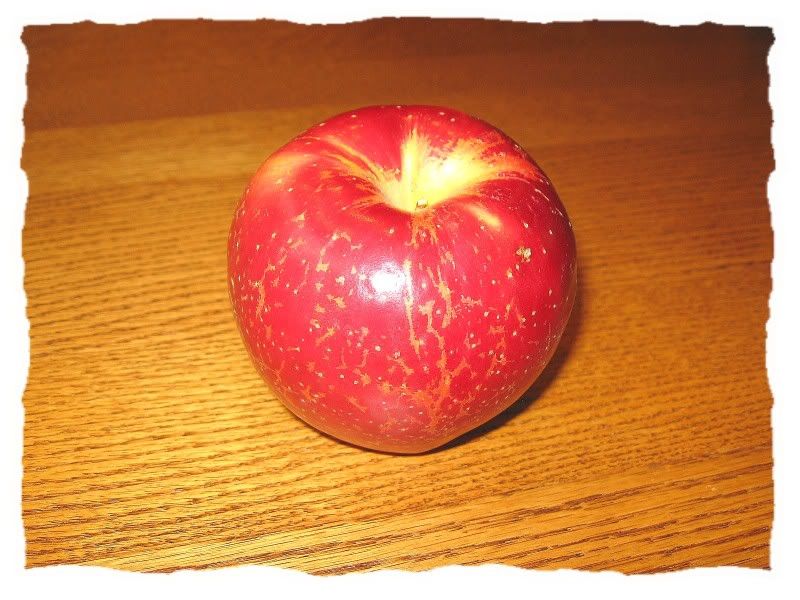
So I'm looking at the different apples and I notice they have a TON of a variety called "Sweet Tango." On sale...and free samples, too. So I tried a piece...and OMG! Now, I'm not an apple-lover. I mean, they're OK...I have nothing against them...but give me a peach any day. So I was absolutely shocked at the deliciousness. I think my eyes rolled back in my head. Crisp...sweet...JUICY. The BEST apple I've ever eaten. Truly. This is what all apples aspire to be.
So...go buy yourselves some "Sweet Tango's." Do you hear me?
By the way...I have no idea where these apples come from...or who grows them...but, if they want to send me a bushel or two, I won't turn them down.
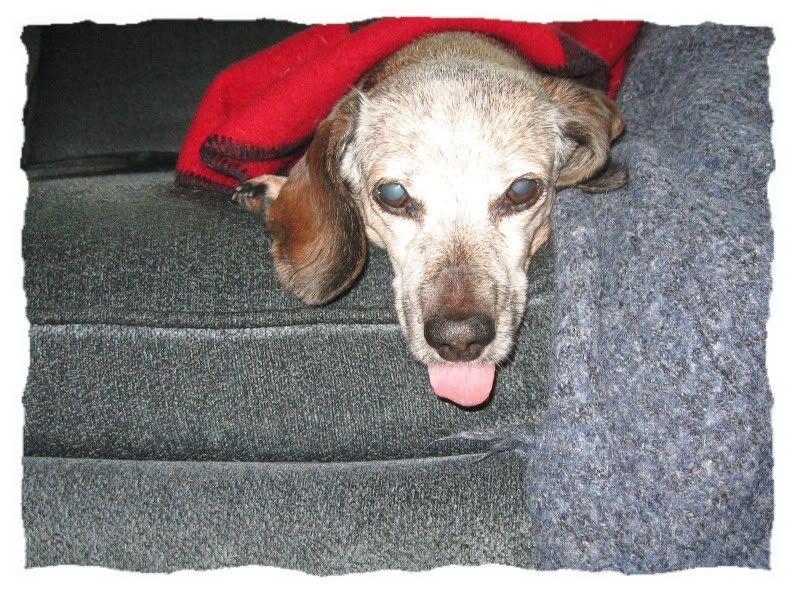
A couple of days ago, my "niece" Sammy came over to spend the day and have a sleep-over with her brother and sister. She was so exhausted from playing that she fell asleep on the couch. When she sleeps deeply, she sticks her tongue out like this. She had just opened her eyes when I snapped the picture.
Isn't she adorable?
One question. How come nobody thinks it's cute when I sleep like this?
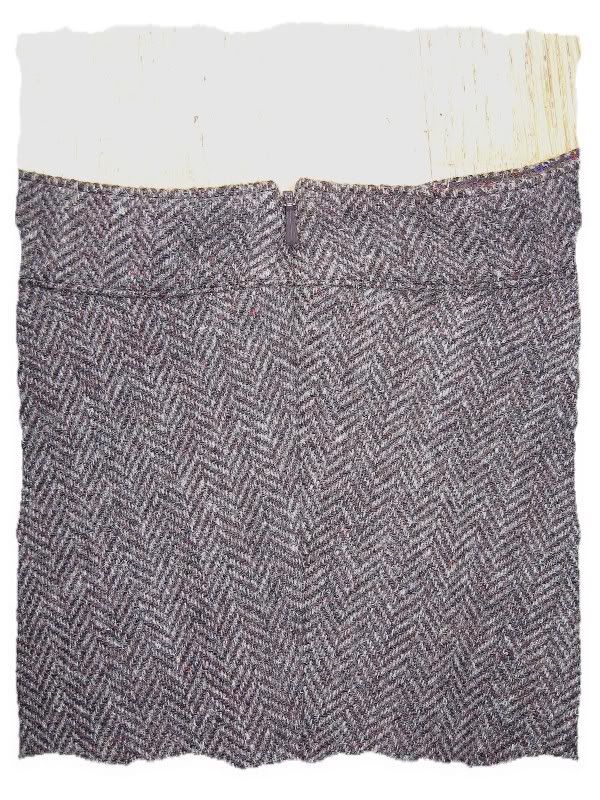
The Zipper Is In! I don't know about you...but this zipper-phobe is always delighted to have this particular step in the rear-view mirror.
That said...I am once again astonished at the wonder of modern technology that is the Invisible Zipper. I LOVE these things...(well, as much as I can love a zipper anyway). I've probably used them just a half-dozen times...and the process is always preceded by much trepidation...but I must say that I've never been disappointed in the result.
Now, I know that many of you don't use them because they're a fairly "recent" invention. You're after an authentic vintage look...and that's OK. But, I do believe that if these had been available to our fore-mothers, they'd have been all over them. I know MINE would've!
Here's my zipper, inserted into the left side seam. My skirt has a contoured waistband...and the zipper extends through it...so I had to complete the lining and construct the waistband BEFORE inserting the zipper.
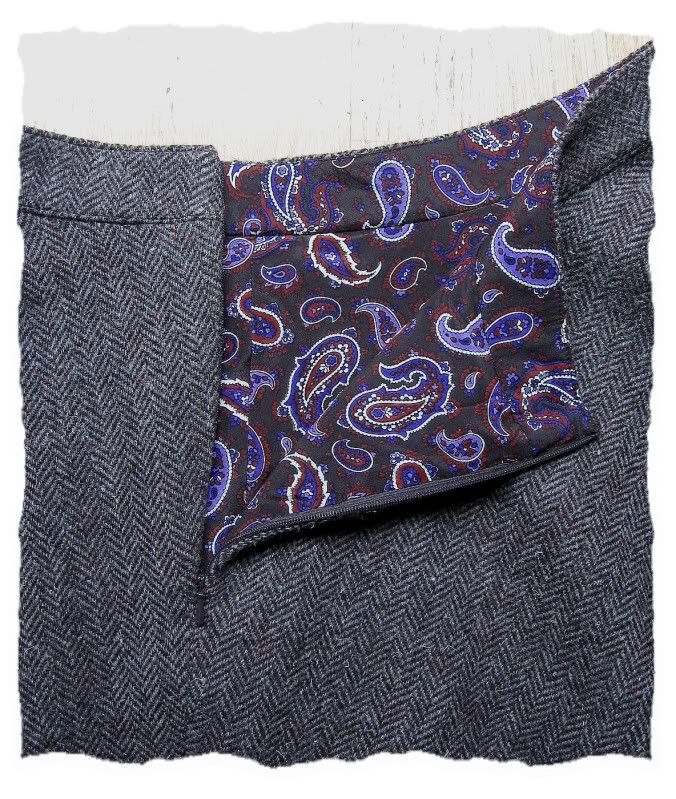
This is how it looks, unzipped...and you can see the paisley silk lining. I faced the waistband with the silk, as well...figuring that it would be less bulky and more comfortable to wear.
Next time, I'll move the top zipper stop down a bit more. I used the recommended 3/4 inch...but after turning, I found I had no room to attach a hook-and-eye.
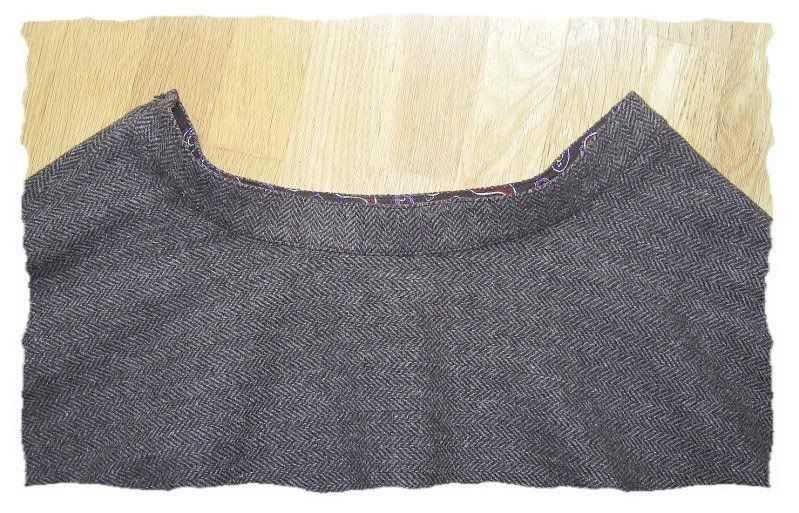
And here it is with the zipper on the side, as it will be worn.
Courage, Circle-Skirters! The hard part is behind us!
Following along with Casey at Casey's Elegant Musings, I'm happy to say that I have my circle skirt cut out and the applique is nearly finished!
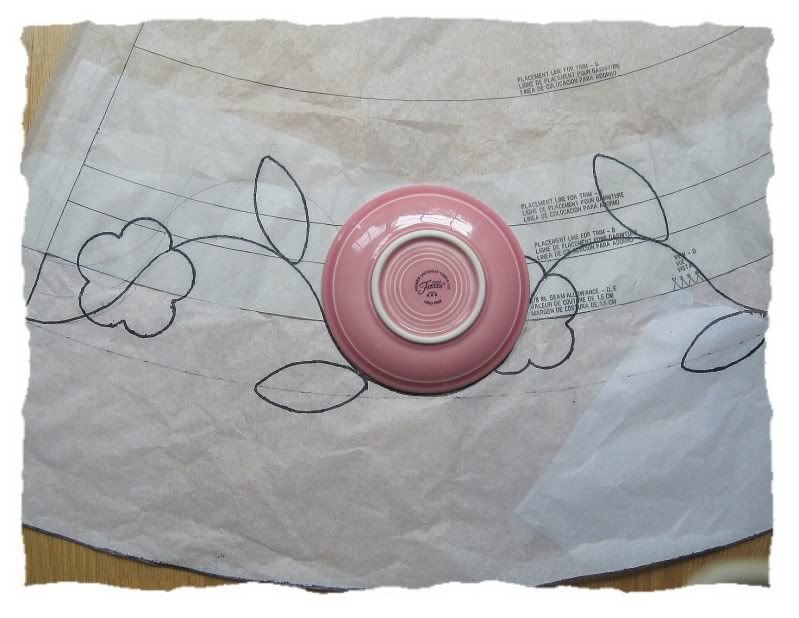
To create the motif, I used my tried and true "what the heck, let's see if this works" method. I knew I wanted a vine-ing design...utilizing some flower and leaf shapes that I drafted several years ago. I don't have any fancy drafting tools...and I needed help with the curves. So I poked around a little bit and came up with a Fiestaware saucer. Perfect! I drew the design directly onto my pattern pieces.
To transfer the design to the tweed, I traced the vine onto plain white tissue paper...and pinned this to the skirt pieces. I then straight-stitched along the traced line with black thread...and tore the tissue away. This left me with a easy-to follow guideline for my vine...that would disappear into the final satin-stitching.
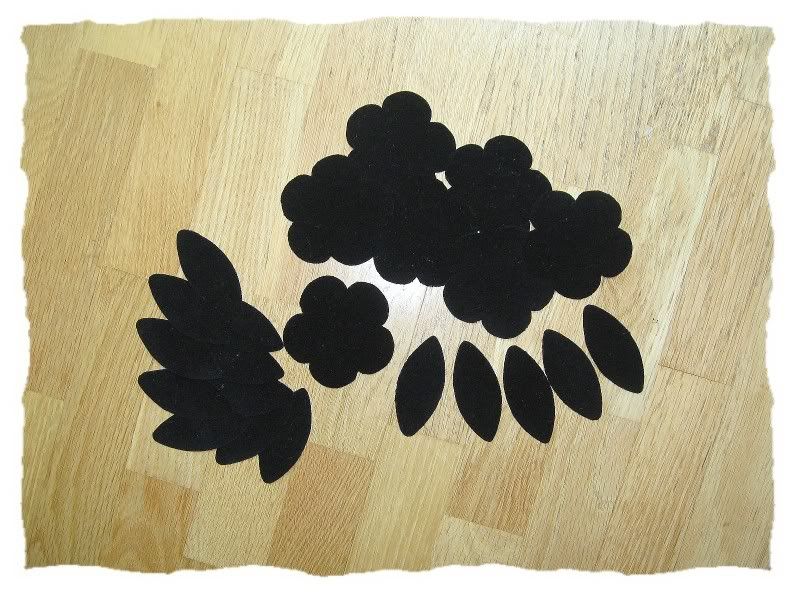
Next, I traced the applique shapes onto a sheet of "Heat N Bond Lite" fusible web...fused them to the back of a remnant of black cotton velveteen...and cut them out. Now, we're ready to applique!
Working in sections, I backed the entire design area with Sulky "Totally Stable" tear-away stabilizer. Then, I satin-stitched along the vine line with black thread. Using my skirt pattern pieces as a guide...I positioned the leaves and flowers along the vine and fused them in place. I outlined each piece with black satin-stitching. (I LOVE to applique...but I think it may be awhile before I do any more!)
You may notice that the finished motif is more "leafy." I thought my original design was a bit sparse...so I added more foliage.
I appliqued the front and back pieces separately, before sewing the side seams. I debated long and hard about this, and I'm glad I decided on this way. Maneuvering HALF a circle skirt through my machine and around all those bitsy curves was difficult enough! Next, I'll sew and finish the side seams...and complete the applique design as it travels over those seams. Then, I'll add the beaded accents to the flower centers and leaves...something I've never tried! Stay tuned!
"Asking a seamstress to mend is like asking Michelangelo to paint your garage." ~Unknown~
"A little studied negligence is becoming to a garden." ~Eleanor Perenyi~
Clyde aka "The Boogie"
Bonnie aka "BonBon"
Welcome to KatyDidStitches...my little home on the web. I hope you will be entertained, amused...and maybe even a bit inspired by my ramblings here. You'll find the musings of a MidWest Sewist...interspersed with funny husband stories, Dachshund adventures, kitchen disasters, garden updates...and anything else life throws my way. Enjoy your visit...and please come back often!


 Isn't she adorable?